Publishing Modules and Solutions
You can use stores to distribute your modules and solutions to end users. For example, if you have created a dashboard, you can package it into a module and put it to the store. Everyone who has access to this store will be able to install your module. If at a later date you decide to update your dashboard, you can upload a new version to the store. Everyone who uses your dashboard will be able to update it as well.
Once you have created the resources that you wish to distribute, follow the steps below to publish them as a module.
Adding a Module
All modules available on a store server are stored in the modules property of the Store plugin.

To add a module:
In the System Tree, navigate to Drivers/Plugins.
Right-click the Store plugin. If this plugin is not installed, see Application Store.
In the context menu, select the Edit Driver/Plugin Properties action.
The Driver/Plugin Properties dialog will open. Navigate to the Modules tab.
In the toolbar, click the Add row button and specify the new module properties.
Specifying Module Properties
Module properties are stored in the individual records of the modules property of the Store plugin.
Property name: modules
Property type: Data Table
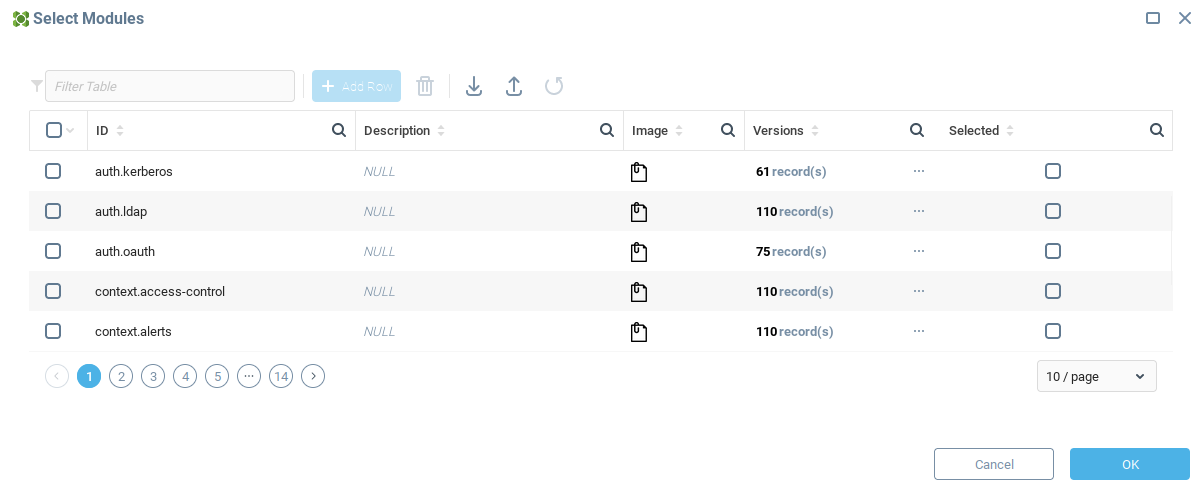
Each record in this data table defines a module:
ID (id). Identifier of the module.
Description (description). Description of the module.
Image (image). Module icon.
Versions (versions). Versioned module contents.
Versions
The versions property of the modules property holds module contents.
Property name: versions
Property type: Data Table
Each record in this table defines module contents for a specific module version:
Version (version). Module version. A single record for the current Iotellect Server version will be created automatically. You can add more versions by adding more rows to this property.
Description (description). Description for a specific verson of this module.
Content (content). Module contents. This field holds a list of files with paths to install them. See Content below.
Dependencies (dependencies). This field holds a list of other module dependencies for the current module. See Dependencies below.
Pre-Install Script (preInstallScript). A script that runs before the module is installed.
Post-Install Script (postInstallScript). A script that runs after the module is installed.
Pre-Uninstall Script (preUninstallScript). A script that runs before the module is uninstalled.
Post-Uninstall Script (postUninstallScript). A script that runs after the module is uninstalled.
Content
The content field of the versions property holds module contents. This field contains a data table with the following fields:
File (file). This field holds file contents.
File Path (path). This field holds the path where the corresponding file must be installed on the server. If this field is empty, the file is installed to the root directory of the server.
Platform (platform). This field holds the value for the target platform. For example, you can use this value to create platform-specific versions of each file. Upon installation, the version for the current platform will be installed.
Dependencies
The dependencies field of the versions property contains information about other modules that this module depends upon. This fields contains a data table with the following fields:
ID (id). Module identifier.
Version (version). Module version.
Scripts
Each module has a number of scripts that can run before and after the module is installed and uninstalled. These scripts are the advanced properties of each module version.
Adding Solutions
All solutions available on a store server are stored in the solutions property of the Store plugin.
Property name: solutions
Property type: Data Table
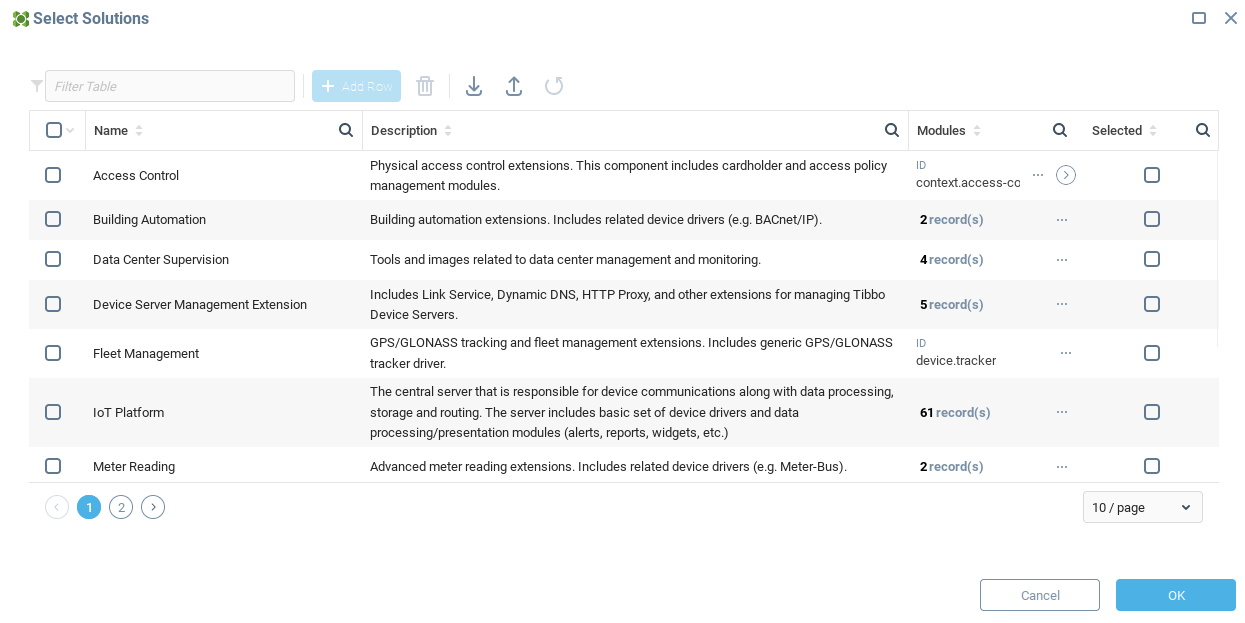
Each record in this table defines a solution:
Name (name). Solution name.
Description (description). Description of the solution.
Modules (moduleIds). List of modules in this solution.
The moduleIds field contains a data table with identifiers of the modules for the solution:
ID (id). Module identifier.

To add a solution:
In the System Tree, navigate to Drivers/Plugins.
Right-click the Store plugin. If this plugin is not installed, see Application Store.
In the context menu, select the Edit Driver/Plugin Properties action.
The Driver/Plugin Properties dialog will open. Navigate to the Solutions tab.
In the toolbar, click the Add row button and specify the new solution properties.
Was this page helpful?