Using Sub-Dashboards
Iotellect Dashboards allow building very complex layouts by combining multiple components of diverse types and nesting containers with dynamic values. This tutorial will help you build advanced layouts which change based on the environment. Such dynamic dashboards can be build using nested sub-dashboards which allow for templates to be selected and displayed based on user input.
This tutorial illustrates the following concepts of dynamic dashboard templates:
Using multiple levels of nested sub-dashboards.
Changing sub-dashboard template references while the dashboard is being displayed.
Defining Source Data
To illustrate the concept of sub-dashboard nesting, we'll develop a number of dashboards to visualize the status and contents of a modern vending machine which can be monitored and audited remotely. We assume our machine can provide some data about remaining goods, as well as diagnostic information.
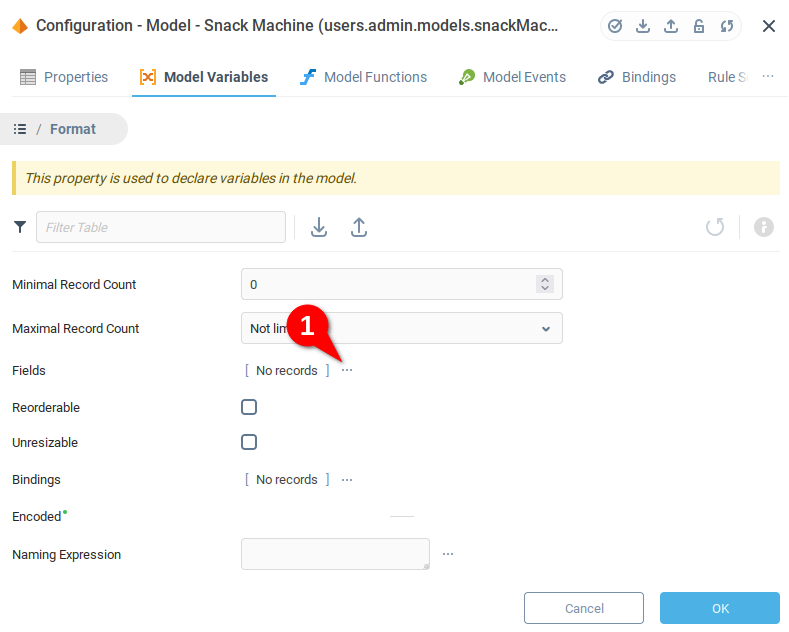
For our tutorial, we've modeled a simple snack vending machine using a Data Table Contents. We’ve created the model via the Models node in our system tree (1), navigated to the Model Variables (2) tab, added a variable which we’ve named Contents, made the table writable (4) and opened the Format field (5), where we will add some sub-fields which will describe the contents of our machine.

From the Format menu, we open the Fields menu (1):
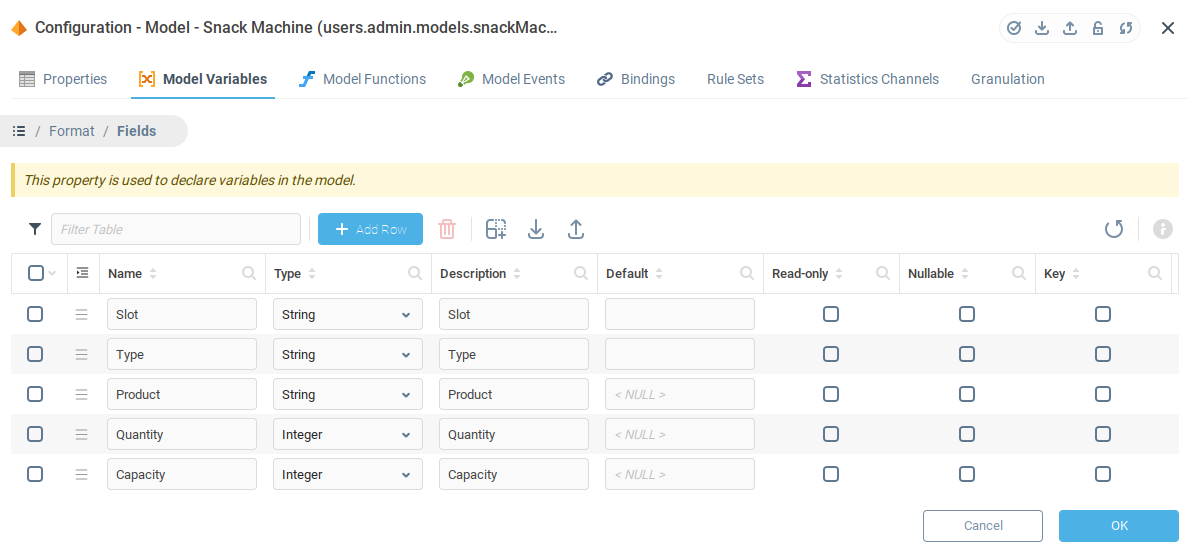
From the Fields menu, we add a number of fields to characterize the status of our machine:
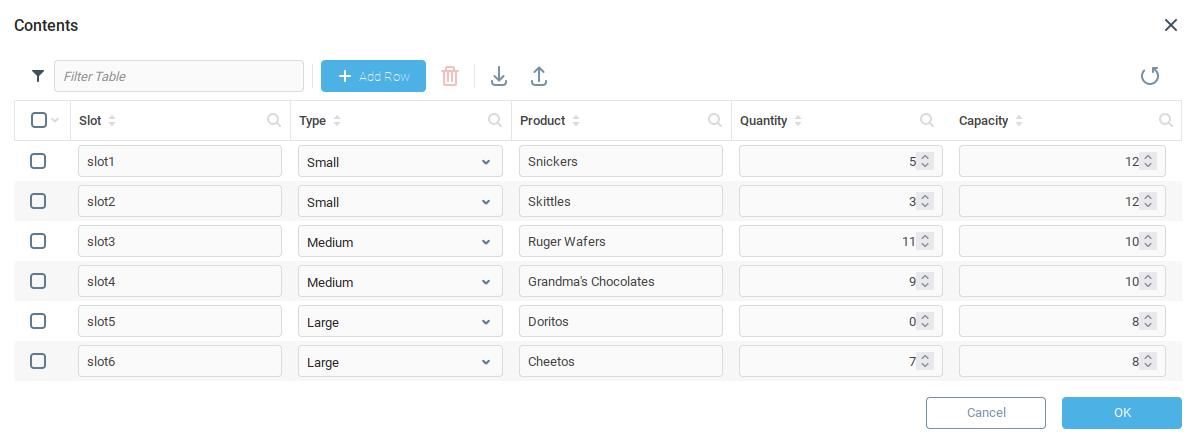
Slot - Location of the product in the machine.
Type - type of the dispenser (small, medium, or large)
Product - name of product currently loaded into the dispenser
Quantity - number of items currently contained in the dispenser
Capacity - current capacity of the dispenser
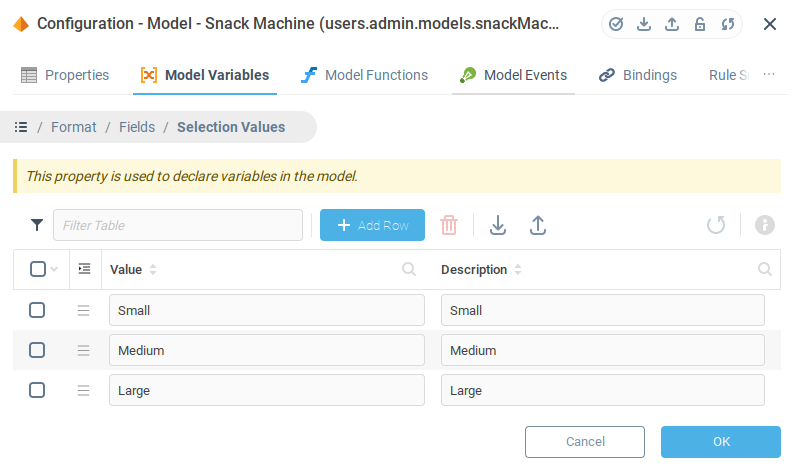
Note that we’ve added Selection Values for the type field:
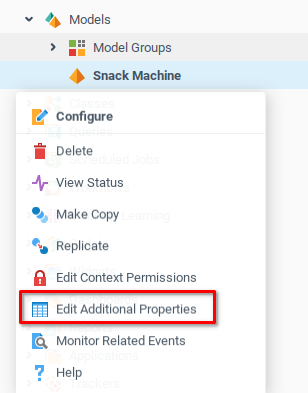
Finally, we will add some example data into our machine model. From the context menu of our Snack Machine we Edit Additional Properties:
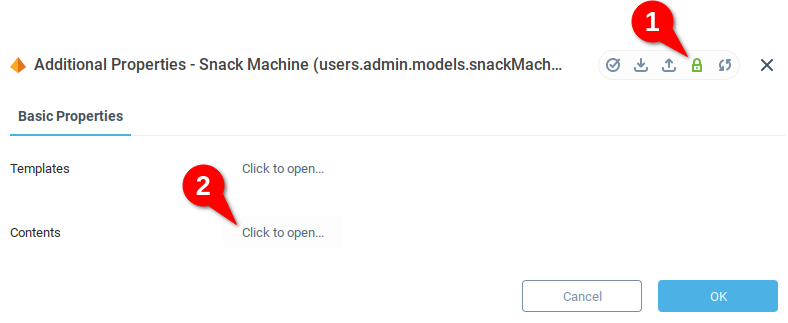
From the Additional Properties menu we unlock the table for editing (1) and then open the newly created table Contents (2).
We add a few slots to our vending machine, indicating the products, the type of slot, the current quantity, and the capacity.
Now that there is some mock data representing the status of the vending machine, we can move on to creating a visual representation in our dashboard.
Machine Layout Dashboard Structure
Our machine will be rendered by a single dashboard called Machine Layout. The dashboard will contain components providing generic information about the machine and a number of sub-dashboards for rendering dispensers. Each of these sub-dashboards will be called Dispenser Slot, and the number of Dispenser Template sub-dashboards will match the number of available slots.
Designing Dispenser Layouts
Let's start with the dashboard for rendering dispensers. We create a dashboard and Name it dispenser_slot1 (1), with Description Dispenser Slot1 and Type Absolute (2). The name is important here, since we'll need to dynamically refer to dispenser template dashboards by their names depending on which slot of our machine is being called.
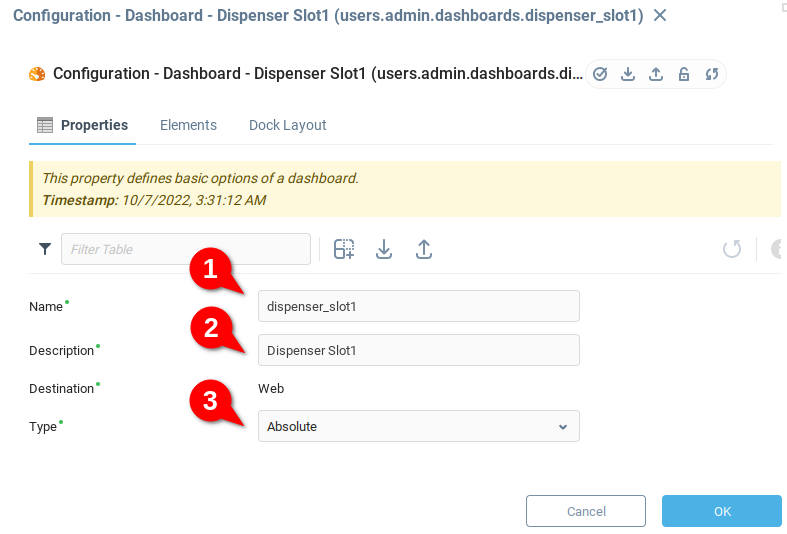
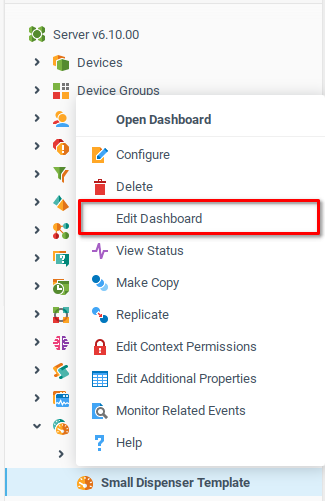
We save the dashboard by clicking OK, and open it for editing by selecting Edit Dashboard from the context menu.
From the Dashboard builder, we open the Component Palette (1) and drag Label components (2) into the top grid cell, and the three bottom grid cells.
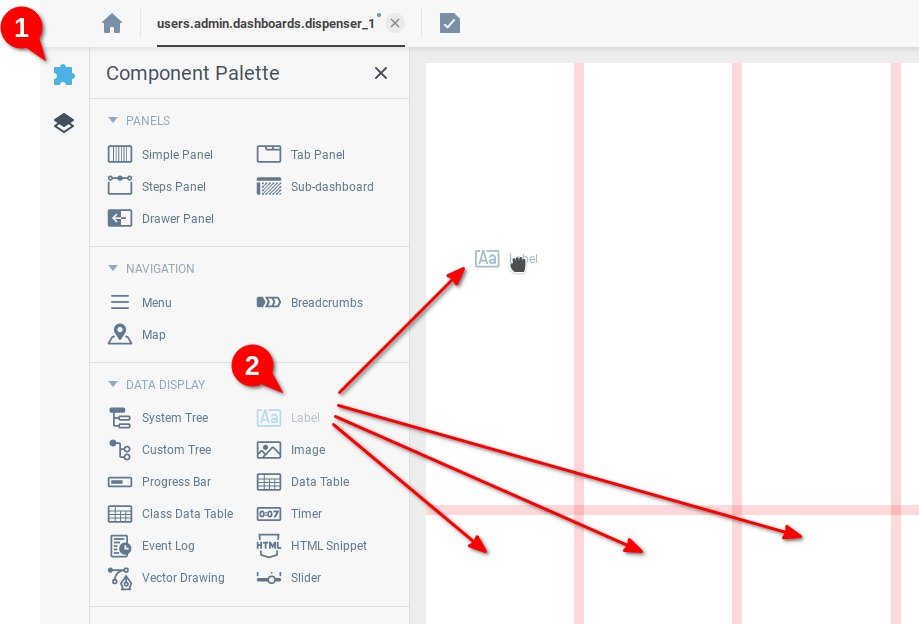
Now that our labels are in place, we edit can open the properties window (1) and rename each component (2)
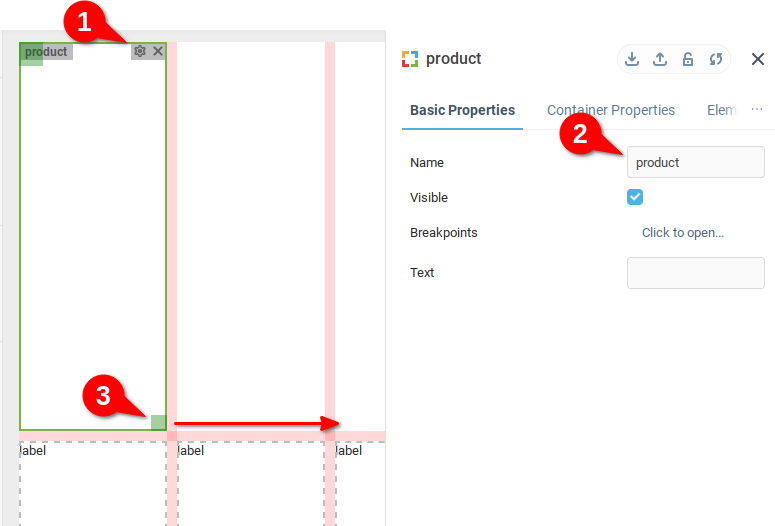
After renaming our components, we can see the component tree has four label components.
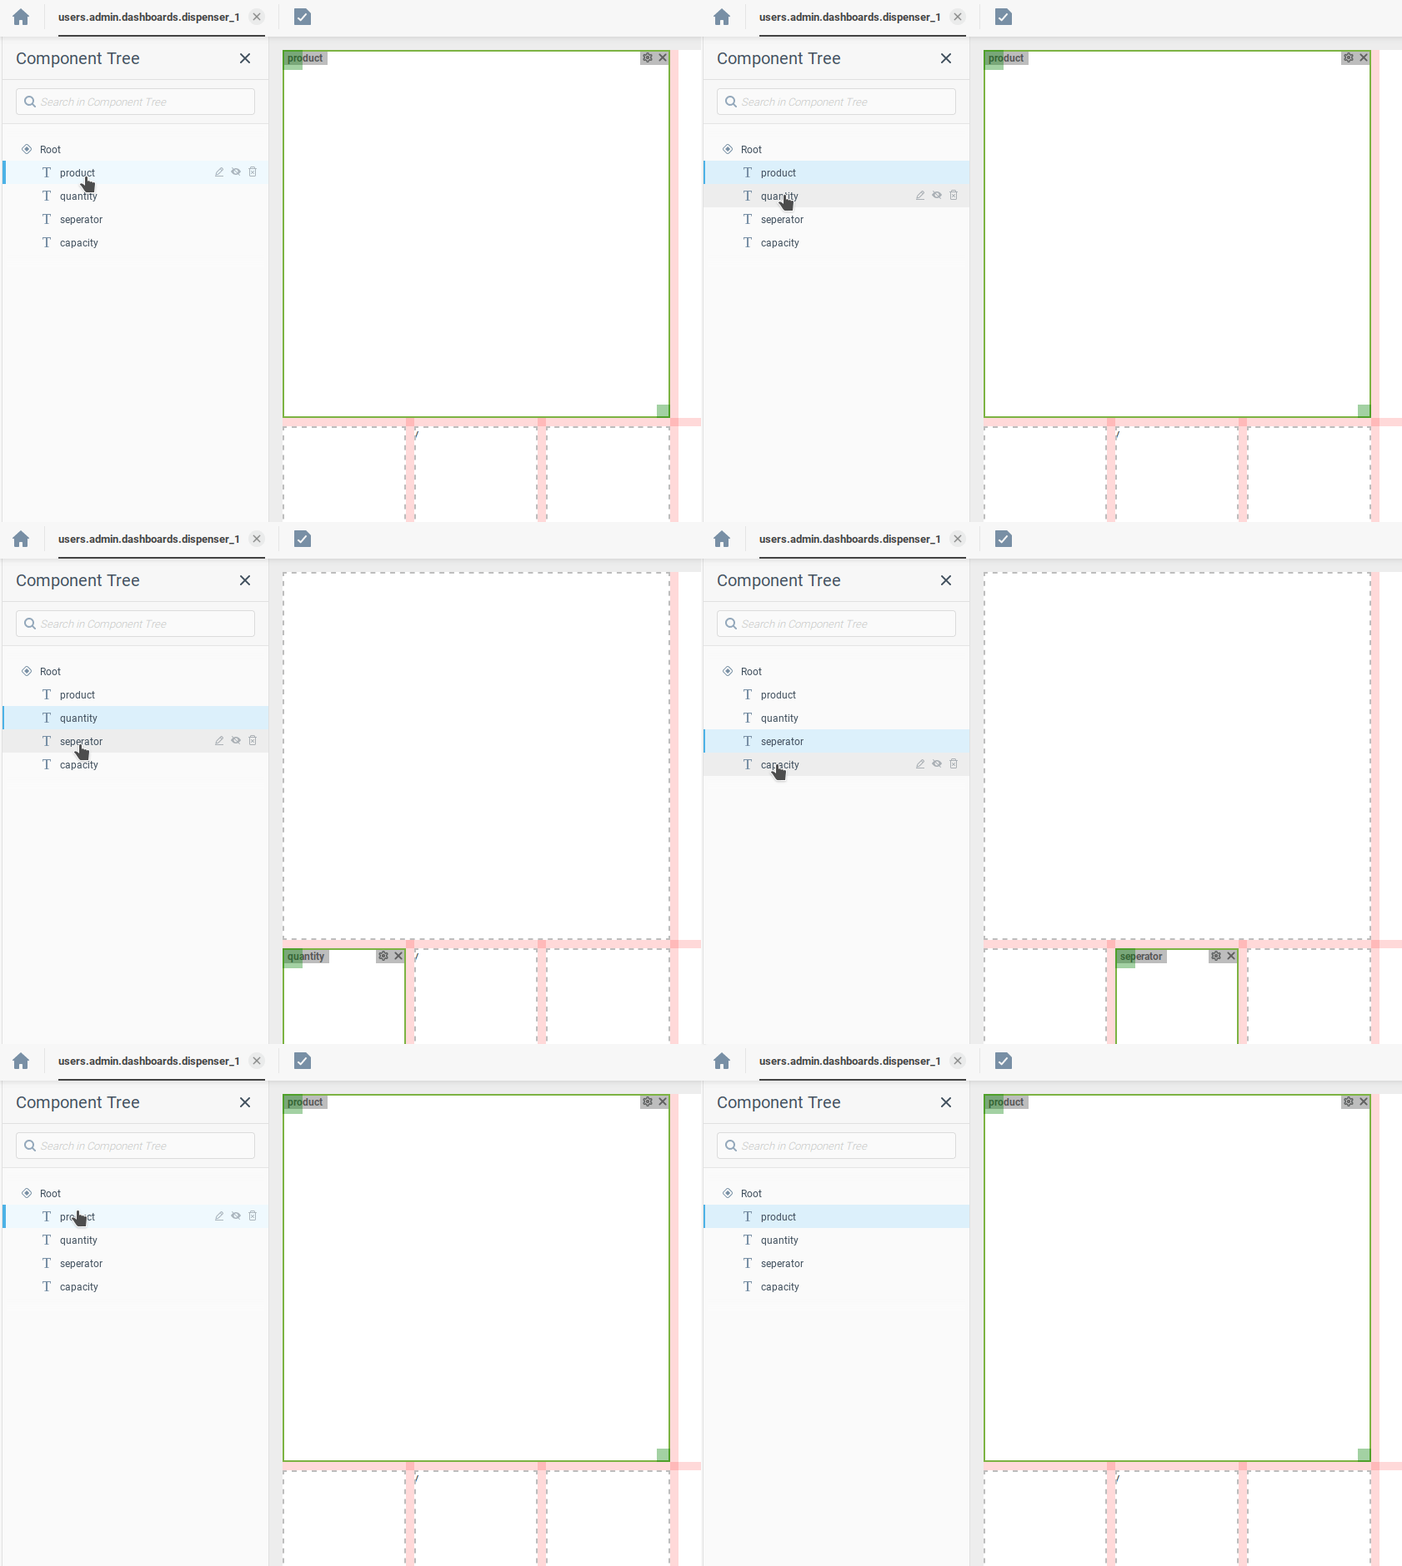
We are focusing here on the interactions between dashboards and sub-dashboard components, so the simplest design will be used.
In order to control the font size and alignment of the text of our components, we open the properties editor (1) for each component and open the Element Style tab (2). Any valid CSS can be used here, but we choose to simply center the text and increase the relative font size.
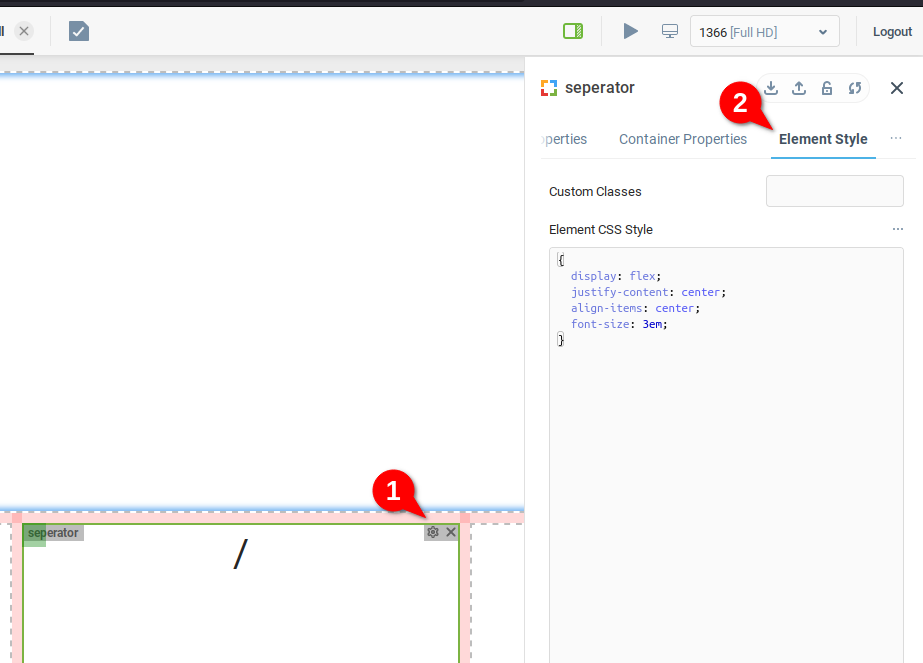
We’ve used the following CSS code to change the font size:
{
  display: flex;
  justify-content: center;
  align-items: center;
  font-size: 3em;
}Note the line font-size: 3em; here we are increasing the relative font size.
Bindings for Template Dashboard
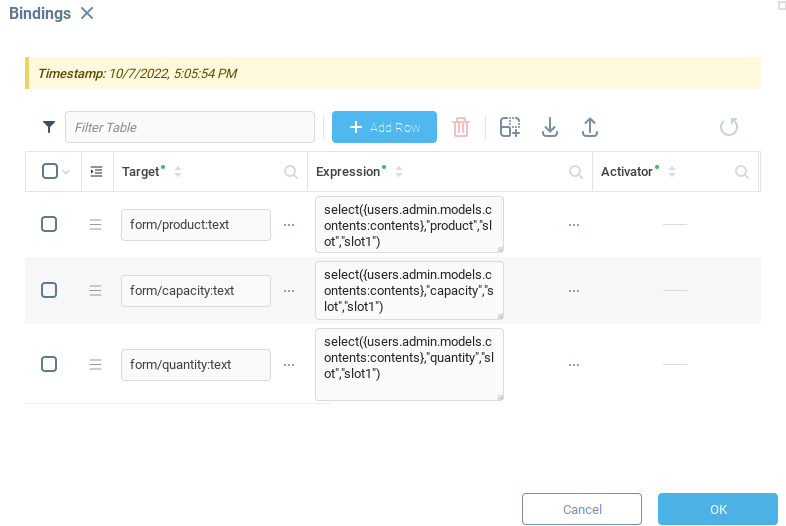
Before making copies of our template, we will add bindings to place the correct data in each of the text labels, product, capacity, and quantity.
From the contents model, we read the table and extract the "product" value and insert it into the the text portion of our product label.
Target |
|
Expression |
|
Activator | - |
Condition | - |
Options |
|
This binding changes the text value of the product label. We add similar bindings for the capacity and quantity labels.
Copying Templates
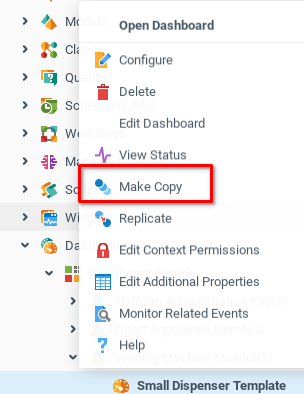
Now that we have an example of a template, along with the correct bindings, we will make a copy for each slot which we want to model. Opening the context menu of the template dashboard, we see the option to make a copy.
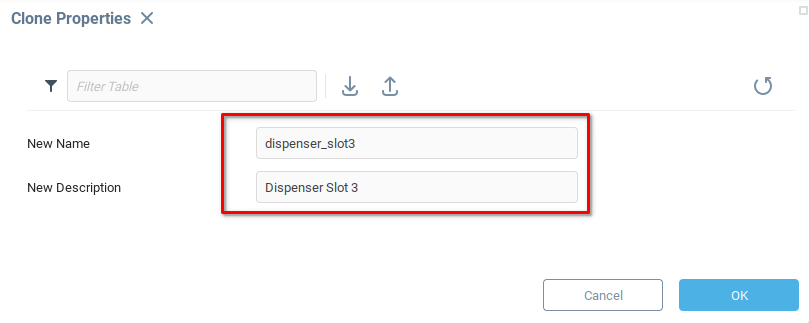
Note that we update the Name of our copies to dispenser_slot2 , dispenser_slot3, and so on, which will allow us to use different dashboard templates in the main dashboard. In our case, we will make copies for dispenser slots 2-6, naming them appropriately.
We now update the bindings for each dashboard dispenser_slot<number>. The product, capacity, and quantity labels were updated with the expression: select({users.admin.models.contents:contents},"product","slot","slot1")
But each dashboard references different slots. So for dispenser_slot2, we will need an expression select({users.admin.models.contents:contents},"product","slot","slot2") and so on for each slot dashboard.
Designing Machine Layout Dashboard
The layout dashboard will serve as a ‘framework’ which will visually display the different slots in our machine. Each slot will be displayed by a sub-dashboard component.
In our tutorial, we'll have just a single machine layout that will be attached to the context of our vending device model. We create a new dashboard and name it machine_layout and configure it with the Grid Column Properties having 2 columns and Grid Row Properties with four rows. Furthermore:
In the top row, we add a Label component to hold a title for our dashboard.
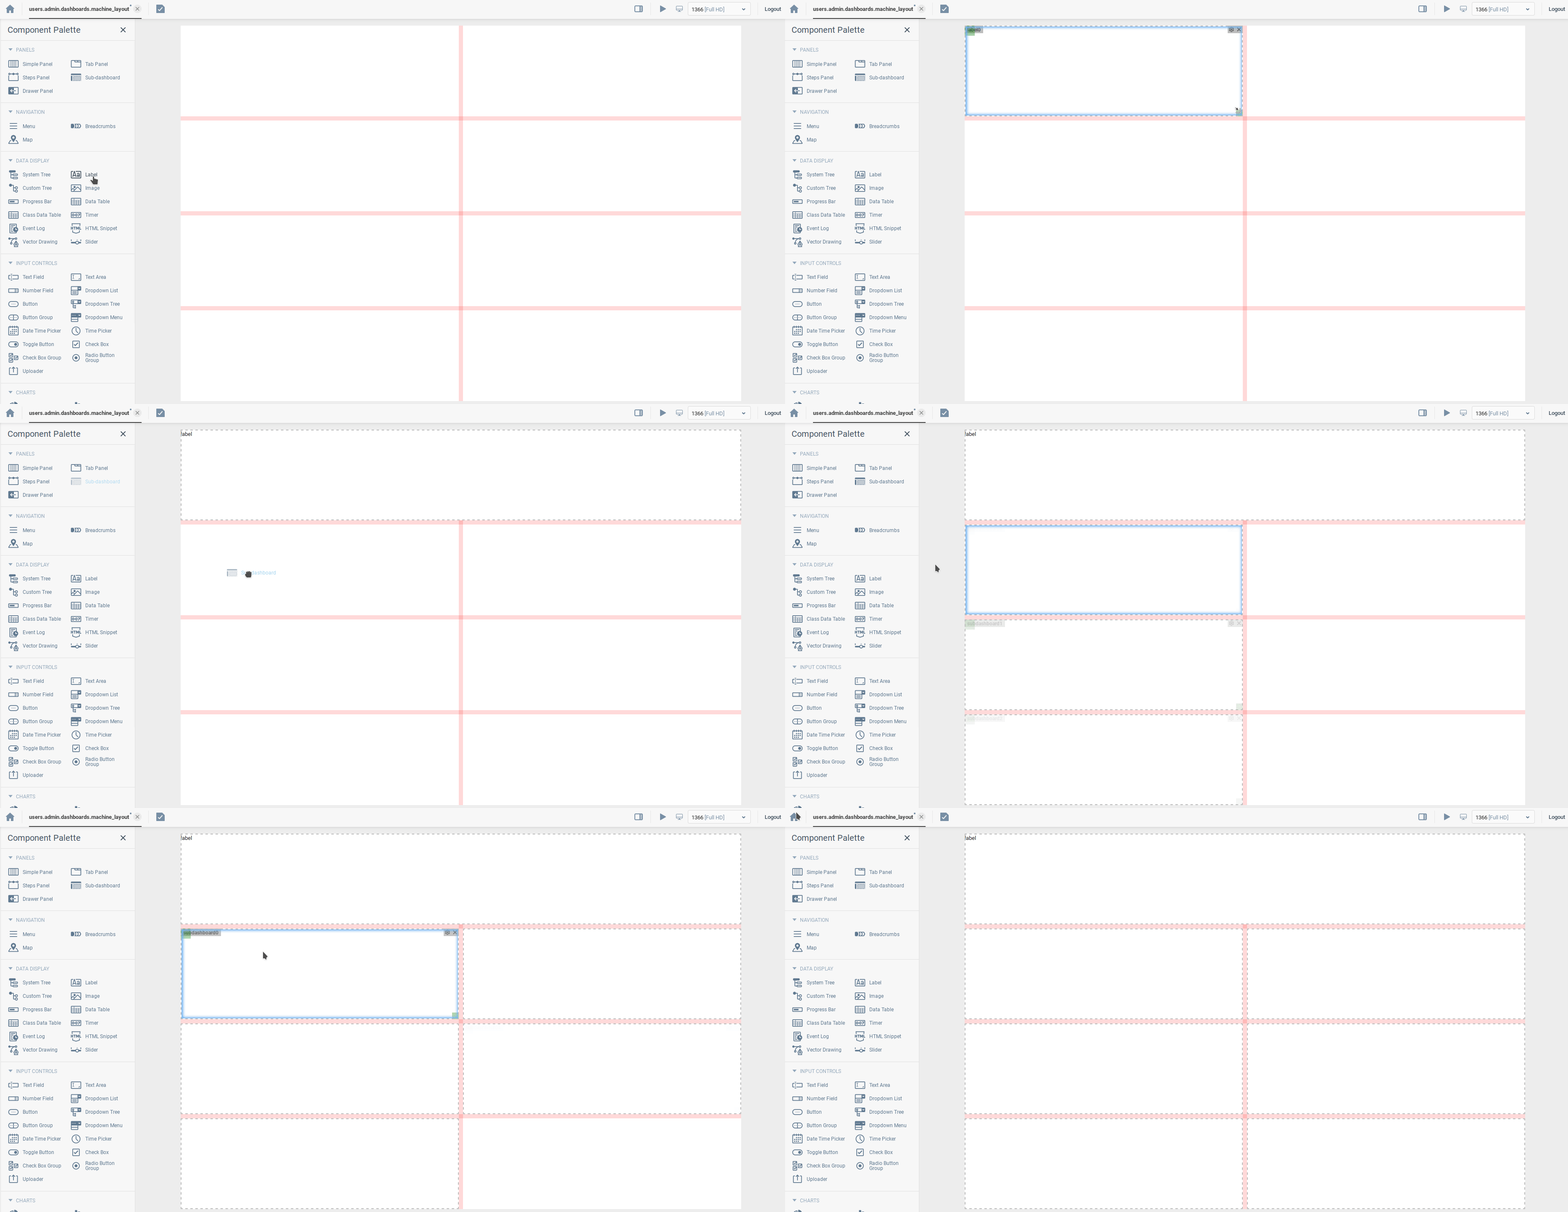
In each of the 6 remaining cells, we add sub-dashboard components which will display the slots holding the various products in our machine.
Adding components should look something like this:
Dynamically Assigning Sub-Dashboard Templates
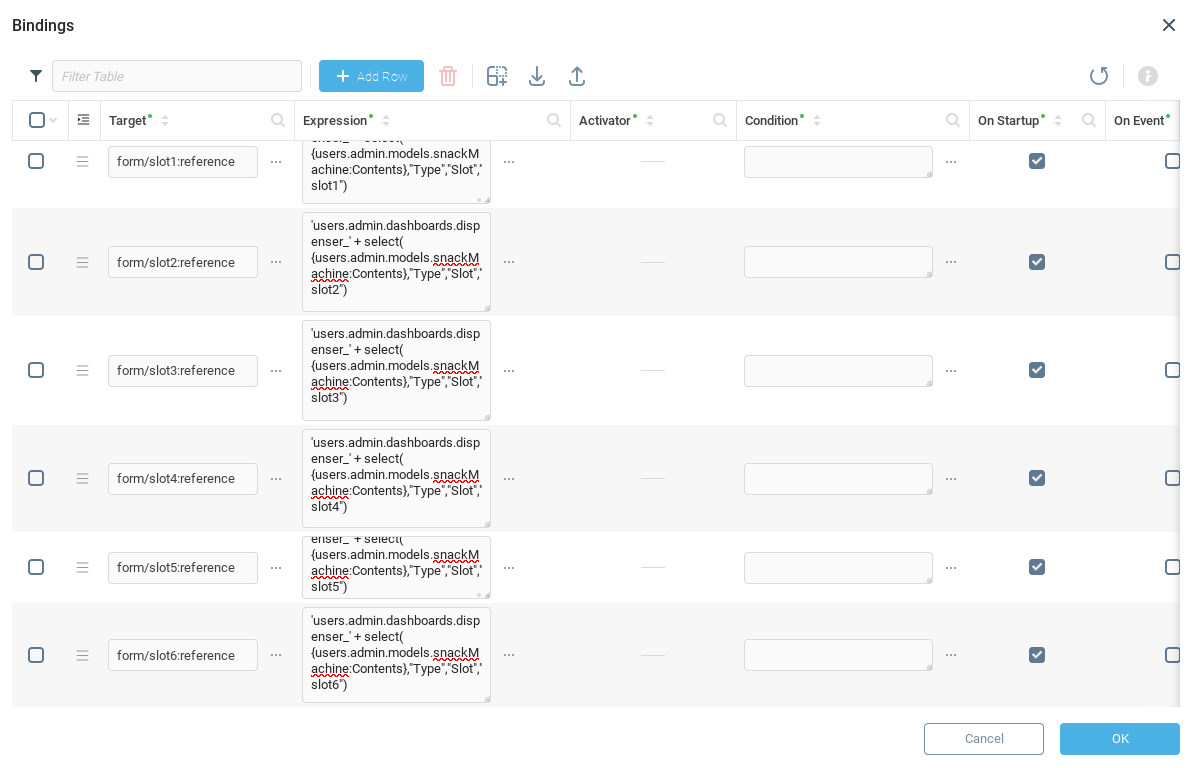
The type of a dispenser currently installed in a slot is defined by Slot field of the Contents table. Thus, we need six bindings that change Reference property of the Sub-Dashboard component during the main dashboard startup. Template bindings should be configured as follows:
Target |
|
Expression |
|
Activator | - |
Condition | - |
Options |
|
This binding changes a template reference of the sub-dashboard representing the contents of slot1, which will be evaluated upon main dashboard startup. Its expression constructs context path of a sub-dashboard that should be used to render current slot contents. This is done by concatenating the context path prefix (users.admin.dashboards.dispenser_) and the value of the dispenser slot number installed in the given slot.
We create similar Bindings for slots2 through slot6 :
Running the Dashboard.
Now that the bindings are in place for our layout dashboard and each of the slot dashboards, we will save our work (1) and launch the dashboard preview (2):

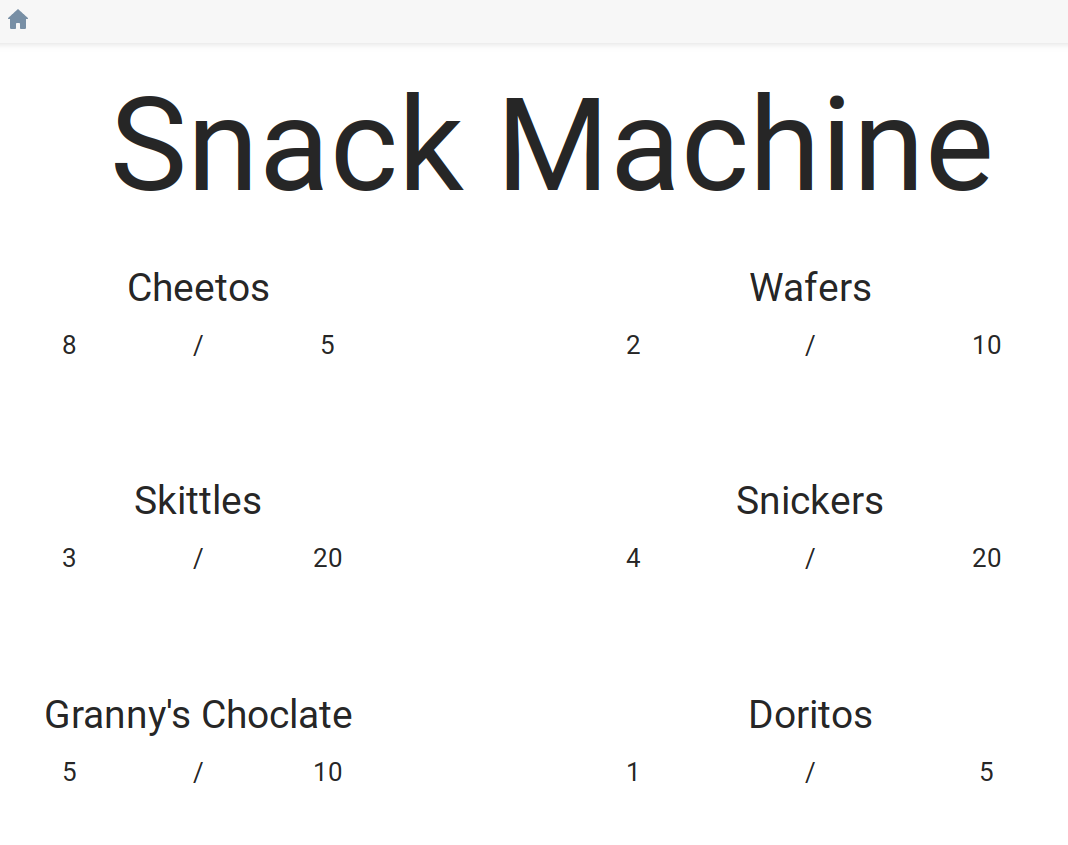
Once our dashboard loads, we should see each of the different slots displayed in the sub-dashboard components:
Was this page helpful?