Creating a Dashboard to Monitor a Device
This tutorial covers the process of creating a simple dashboard for monitoring a Device. Here we use a Virtual Device with a periodically changing random variable which we will monitor in our Dashboard. Connecting and configuring more advanced devices to the server is beyond the scope of this article.
Create a Virtual Device
Open the Devices( ) context menu and choose Add device.(
 )
)
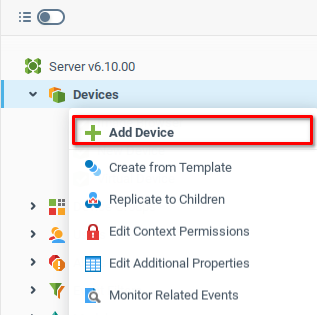
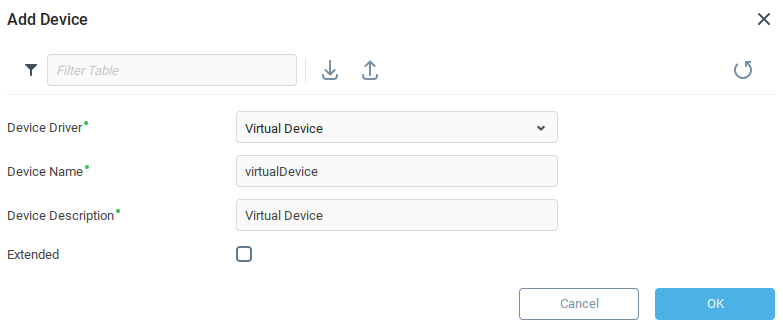
We create a device with the Virtual Device driver and name it appropriately.
Launch Web UI Builder
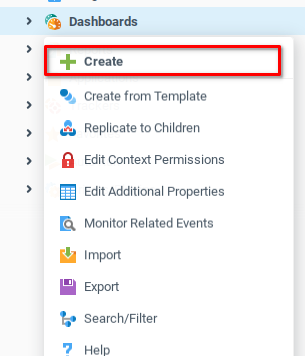
To start creating a dashboard, Open the Dashboards( ) context menu and select Create(
 ).
).
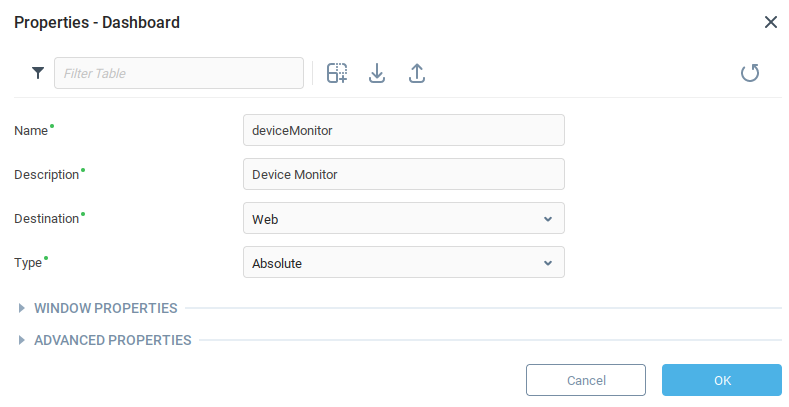
This operation will open the Properties - Dashboard window, which we use to name our device. After clicking OK, the new dashboard will appear in the system tree under Dashboards.
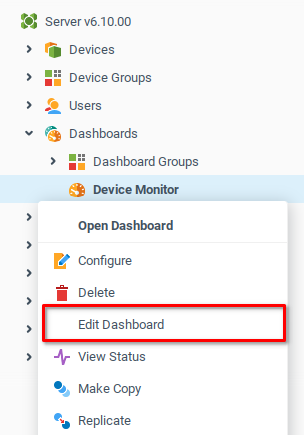
Launch the dashboard by opening the context menu of the new dashboard ( ) and selecting Edit Dashboard.
Adding Dashboard Components
Let's add some components to the dashboard. See Editing Component Layout for details on manipulating dashboard components.
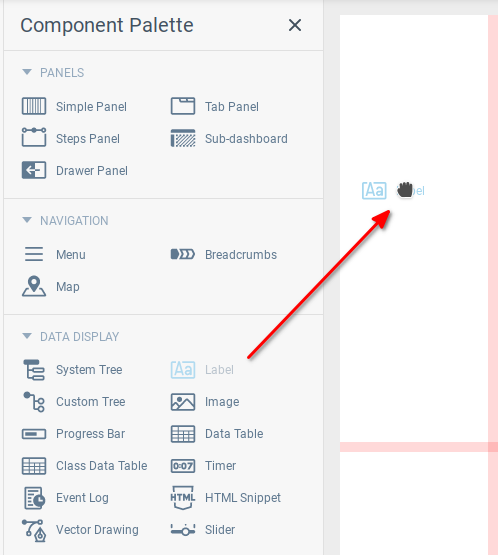
Drag the Label component () from the component palette and drop one into the first and one into the second grid cells. One will be a label, and the other will display the variable value from our device.
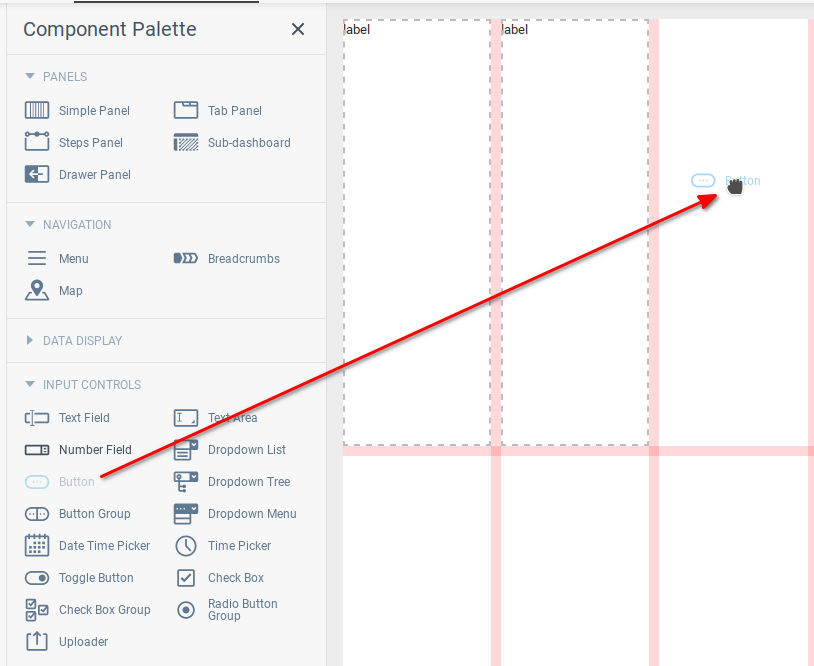
Next we add a simple button which we will use to refresh the variable value. From Input controls we drag a button () into the next free grid cell.
Editing Component Properties
Updating Basic Properties
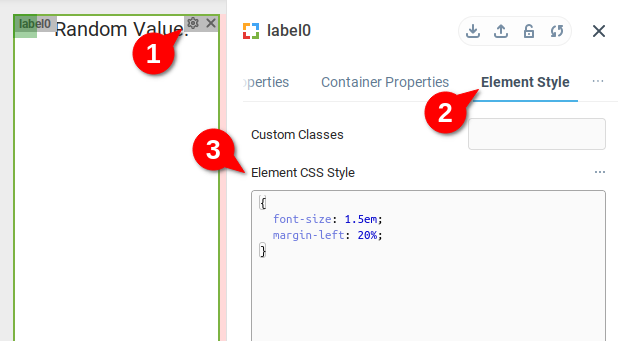
Click on the properties icon of label0 (1) and change its Text property (2) in the properties window to Random Value:
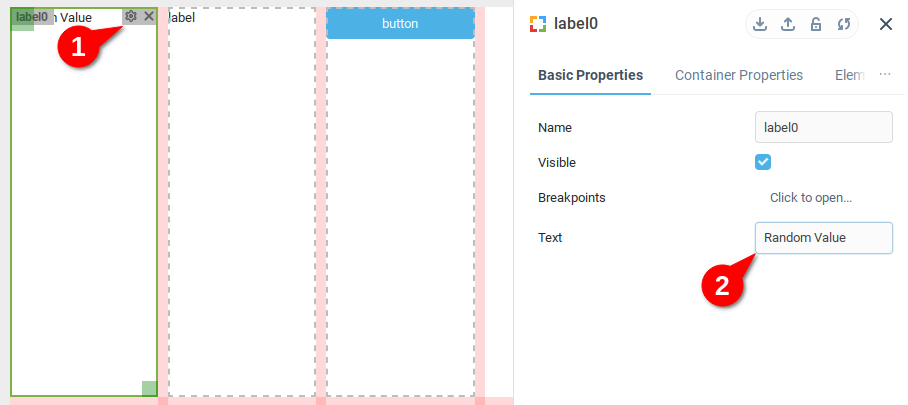
Similarly, we change text of label2 to Refresh and change the Label property of button0 to 0
Updating Element Style
While a detailed discussion of using CSS is outside the scope of this tutorial, we will show how to change the font size and margin of our labels and button.
Open the properties window for lable0 and navigate to Element Style. We add some simple CSS to the Element CSS Style to increase the font size and shift the margin slightly:
{
font-size: 1.5em;
margin-left: 20%;
}
Similarly, we add the same simple CSS to the Element Style of label1:
{
font-size: 1.5em;
margin-left: 20%;
}And change the font size of button0 through the Element Style property:
{
font-size: 1.5em;
}Save our progress (1) and launch the preview of our dashboard (2)

Our preview should look something like the below:

Creating Bindings
At this step we'll bind components of our dashboard to data from our virtual device. This data is presented in the form of context variables. Our virtual device has a number of example variables included, but we will use the Random Value variable which can be found under the Waves tab. By default, a random number is generated every ten seconds. We will retrieve and display this number using our dashboard.
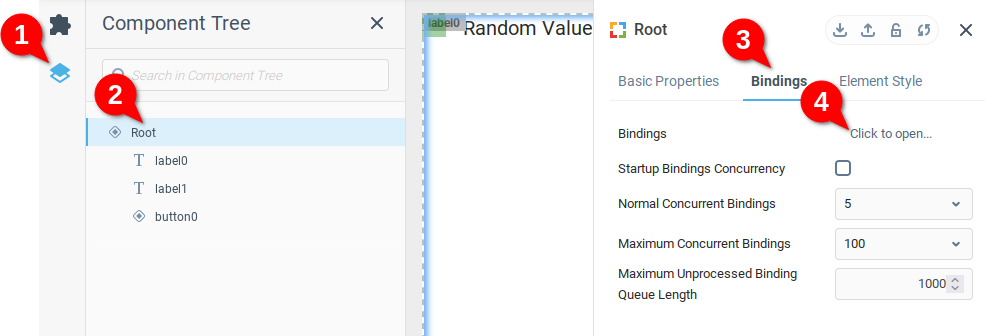
To create the bindings which will be used in our Dashboard, we open the Component Tree (1) select the Root component (2) open the Bindings tab (3) and finally open the Bindings table (4).
From bindings table, we Add Row (1) and choose On Event (2) and notice that a field for the Activator event (highlighted) is created. Finally, we open the Select Target window (3).

The Target in this case, is the value of the text field in label1. We select the Properties tab (1), expand the label1 node (2) and choose the Text variable (3):
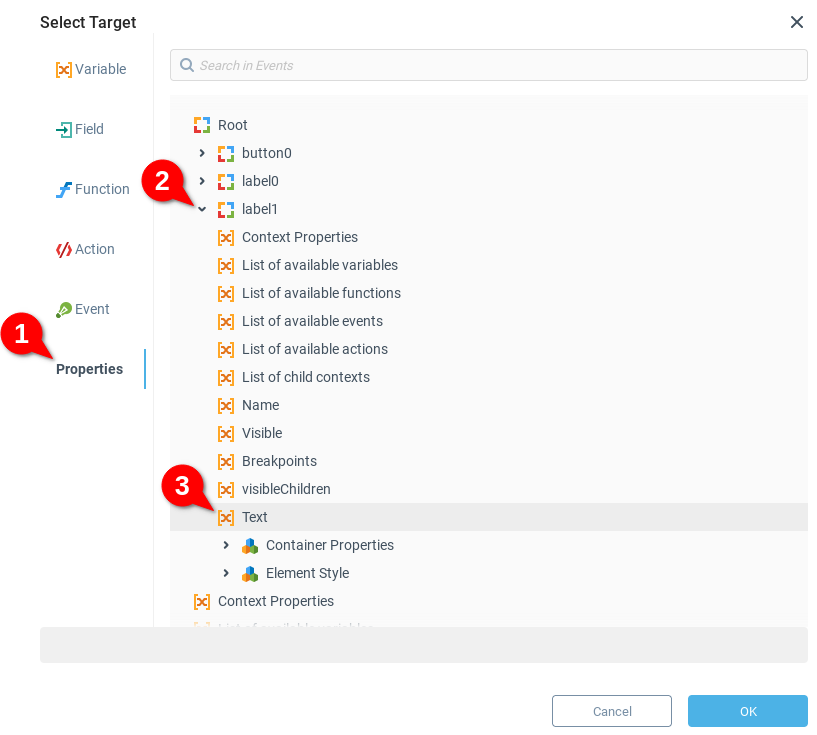
We see that the context path to the target variable is form/label1:text (1) and then open the Expression editor (2).

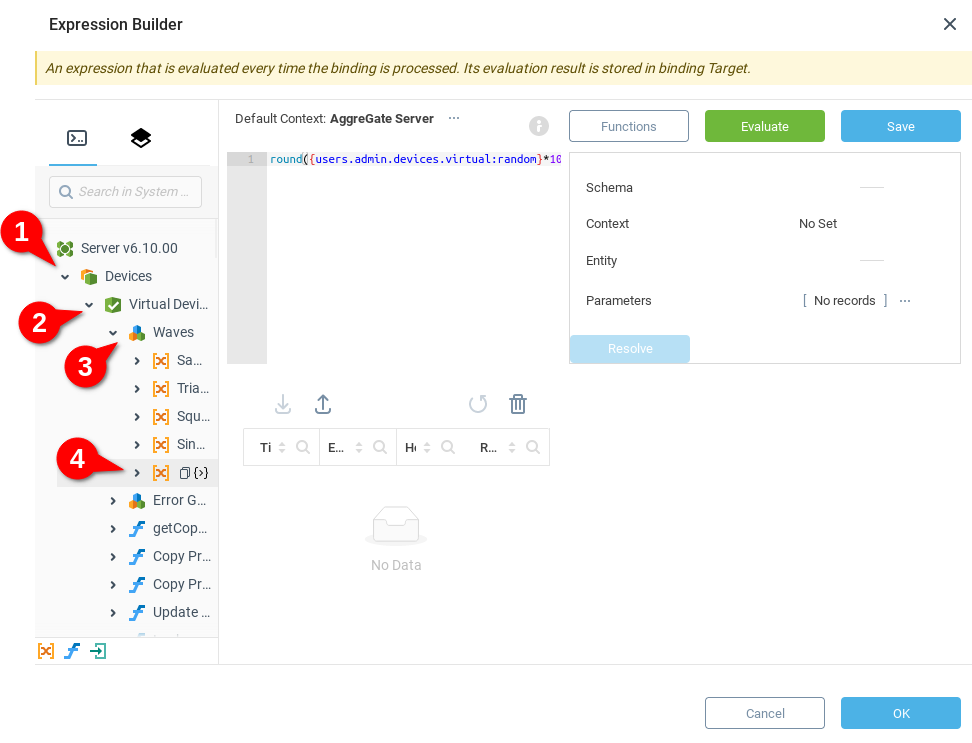
The expression will determine the value which will be sent to the Target. In our case we first find the context path to the random variable of our virtual device. In the system tree we expand Devices (1), then Virtual Device (2), Waves (3) and finally click the {>} icon of the Random variable (4) to insert it into our function. The path to our Random variable is {users.admin.devices.virtual:random}.
We will multiply our result by ten, so the expression becomes 10*{users.admin.devices.virtual:random}.
And finally, we will use the round() function to give a cleaner answer, with the final expression appearing as:
round(10*{users.admin.devices.virtual:random})
We want the dashboard to refresh the random variable when clicking the button. We choose the Activator field to open the Select Activator dialogue. From here we choose the Component Event tab (1) expand the button0 component (2) and finally the Mouse Clicked event (3). The path to our event is form/button0:mouseClicked@.
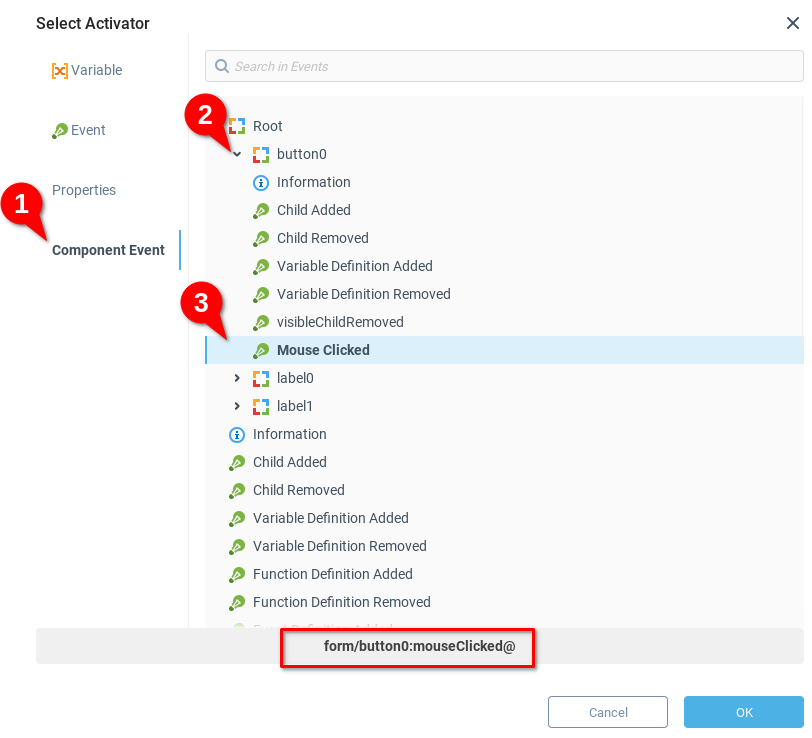
We see our bindings table has values for the Target, Expression and Activator fields and click OK:

We save and run our dashboard, using the button to refresh the Random variable from our Virtual Device value:

Was this page helpful?