Multi-Tenant Access Control
Permissions for users of enterprise systems must be organized and administered appropriately. There are many valid solutions and models for this for managing permissions. In this tutorial, we will consider the "Multi-tenant access control structure" model which allows you to organize users with different permission levels into a "tree". The root of this "tree" is single Administrator, which has permissions for any action. Lower level users, such as Tenant Administrator and then End user with lower permissions, are the "branches" of the "tree". The most significant feature of this scheme is that it allows you to manage enormously complicated permission schemes through a straightforward tree structure. In this tutorial, we will create a multi-tenant access control model with the structure depicted below:
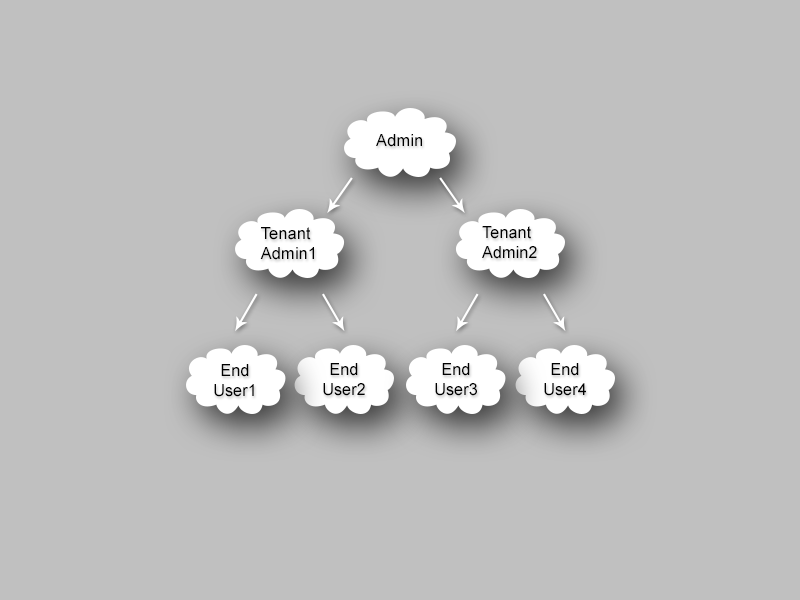
This picture illustrates relationships between three user types, Admin, Tenant Admin, and End User which have the following permissions:
Admin, who has full access to lower permission users.
Tenant Admins, who are able to manage permissions for all End Users branching below them, but do not manage other Tenant Admins or the End Users branching from other Tenant Admins.
End Users have the accesses as defined by the Admin, or the Tenant Admin directly above them.
Now let's see how to implement this scheme on Iotellect Iotellect platform.
Creating a Test Resource
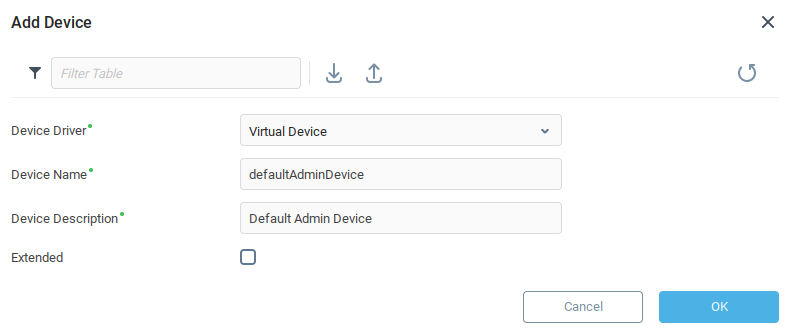
First we log in as admin to the Server and create any test resource, for example a Virtual Device, and name it defaultAdminDevice.
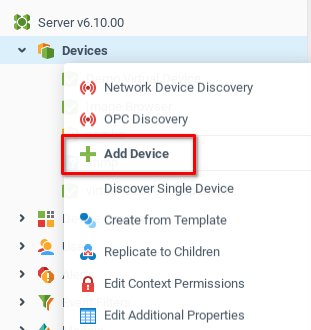
We add a device from the context menu found by right-clicking on the devices node.
In our example, we've created a Virtual Device named defaultAdminDevice:
Creating User Groups
We create four User Groups named Admin, Tenant Admins, End Users 1, and End Users 2
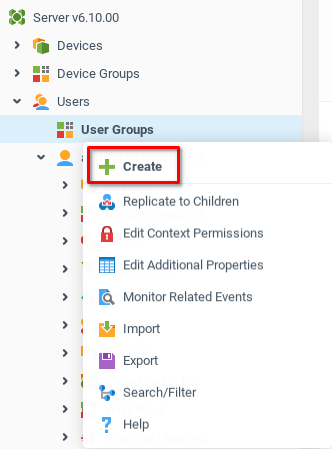
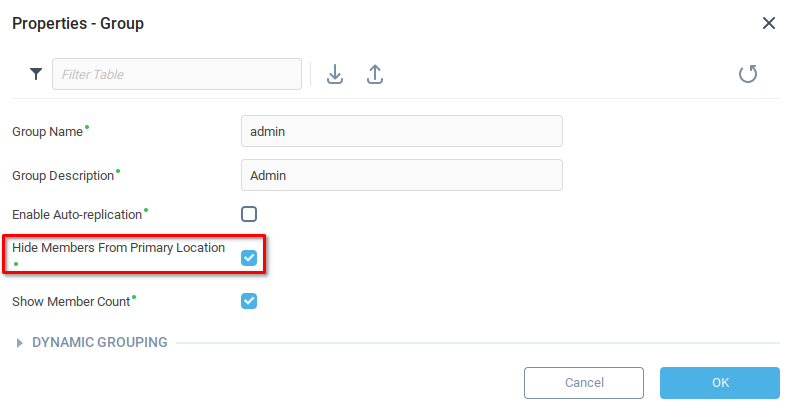
When creating the groups, we select the option Hide Members From Primary Location for each one.
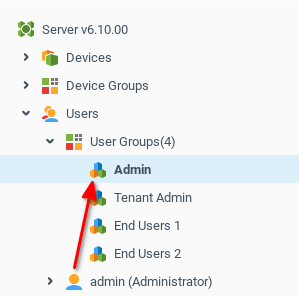
We drag-and-drop the Admin user into the appropriate group.
Creating Tenant Admin User and Relevant Permissions
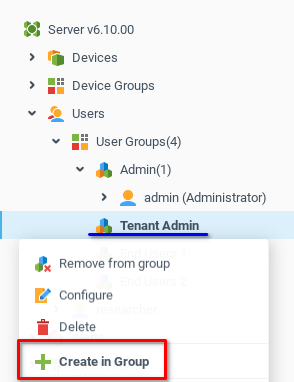
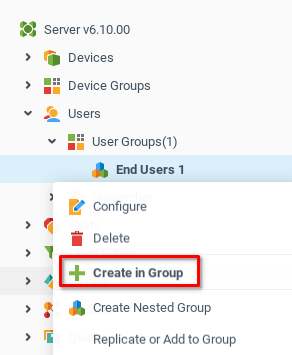
Now we create a Tenant Admin with the name tenant1 in the Tenant Admins group using the context menu Create in Group
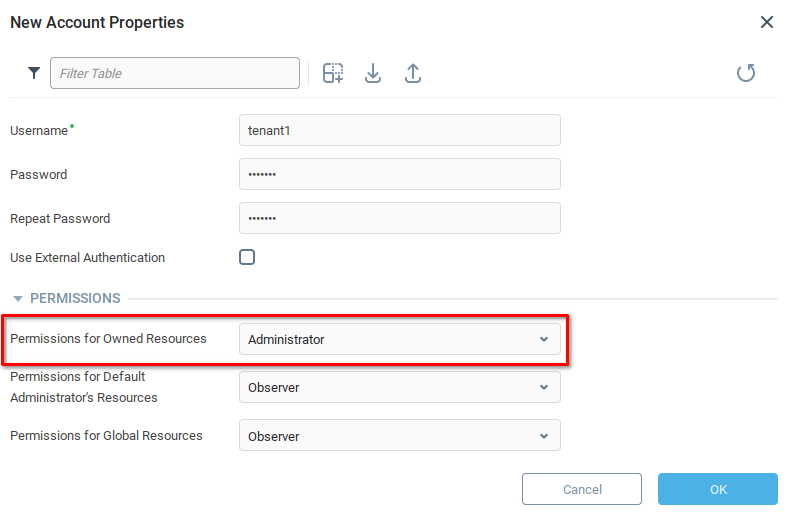
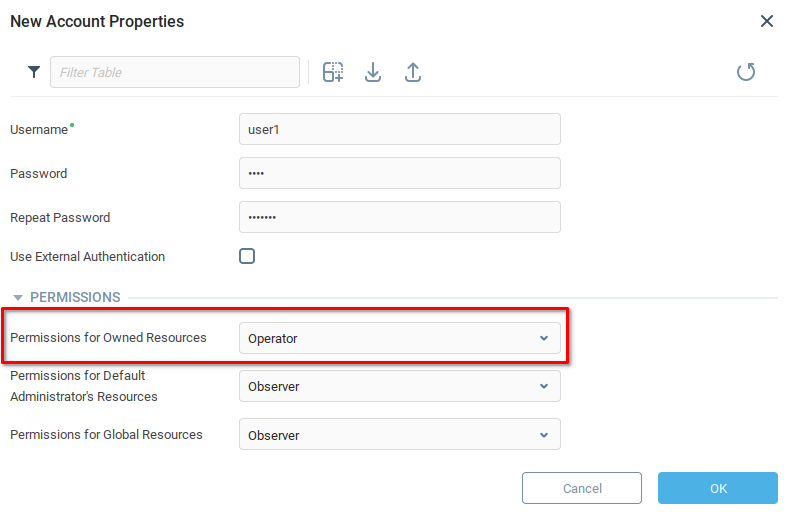
Permissions for Owned Resources are set to Administrator level.
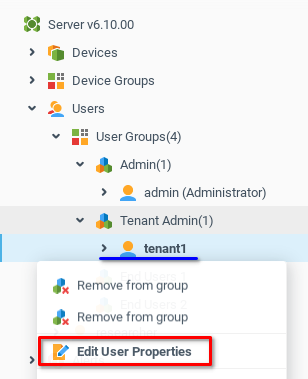
After that, we go to User Properties in context menu and open the Permissions tab.
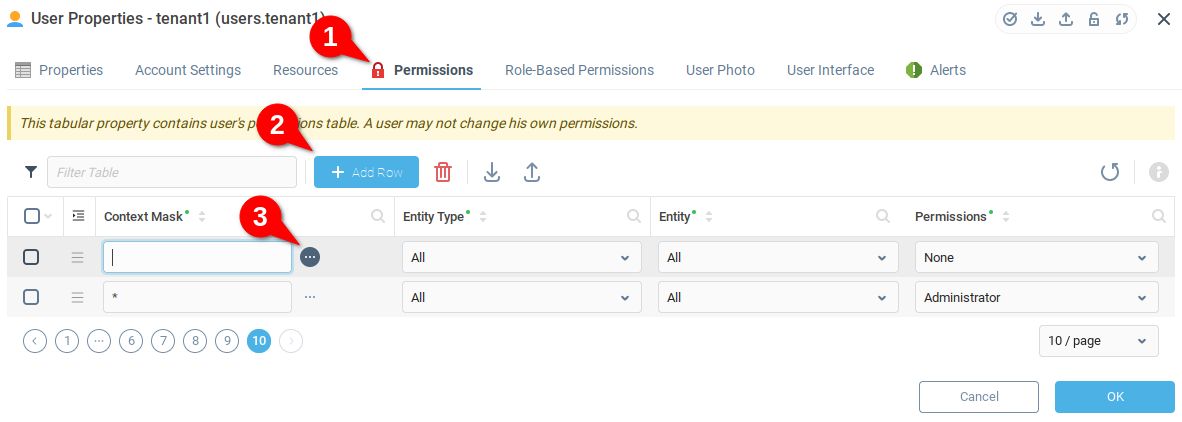
From the Permissions tab (1) of the User Properties window, we add a row (2) and open the Context Mask Selector (3) to select the user group which tenant1 will administer.
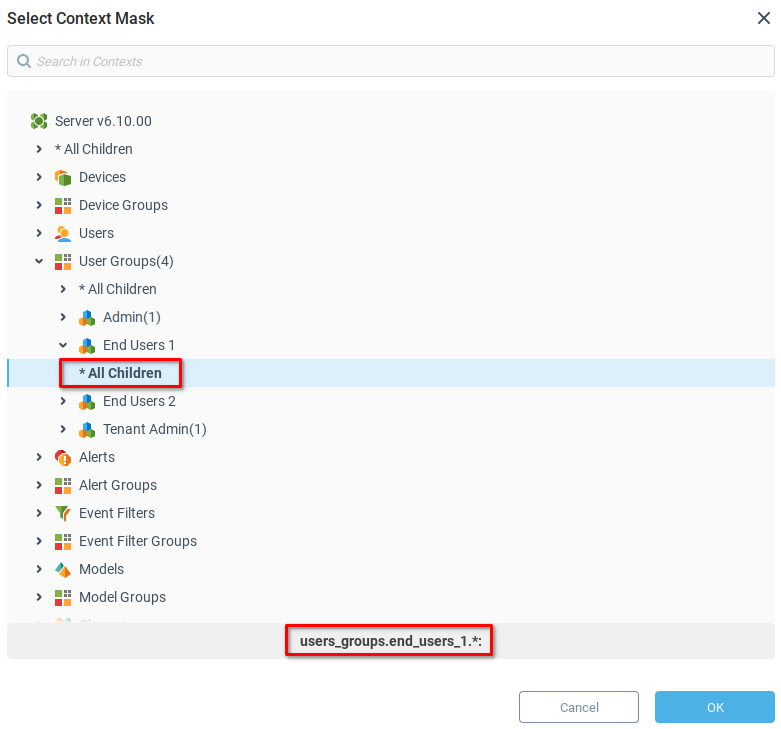
Following the context tree, we find User Groups and the End Users 1 group which we want tenant1 to administer, and select the * All Children option. Note that the context mask text is indicated at the bottom of the modal window as users_groups.end_users_1.*
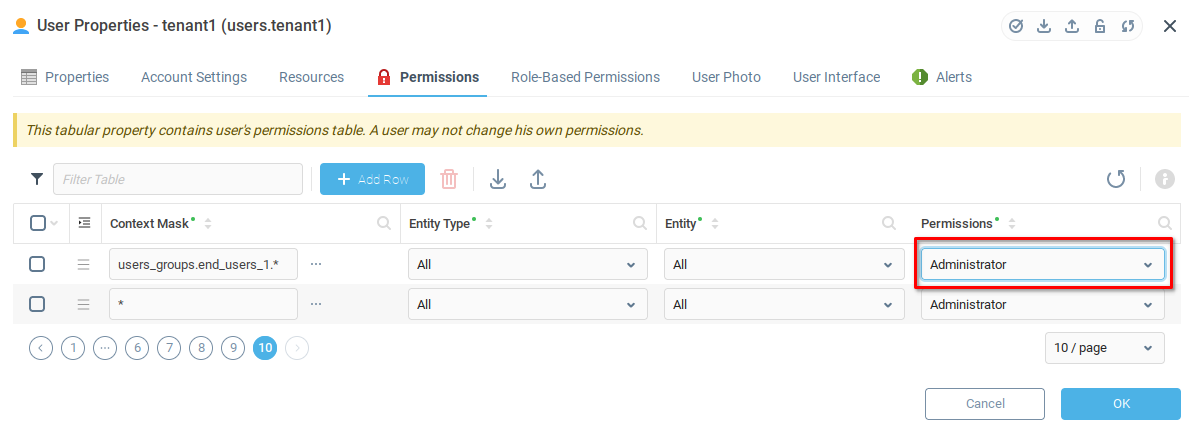
Set the Permissions value to Administrator.
We find the row with Context Mask value of users.* and set the Permissions value to Observer. Note that we've used the search bar to find this row easily.

So far we have granted permission to tenant1 to administer the endUser1 group and view other resources.
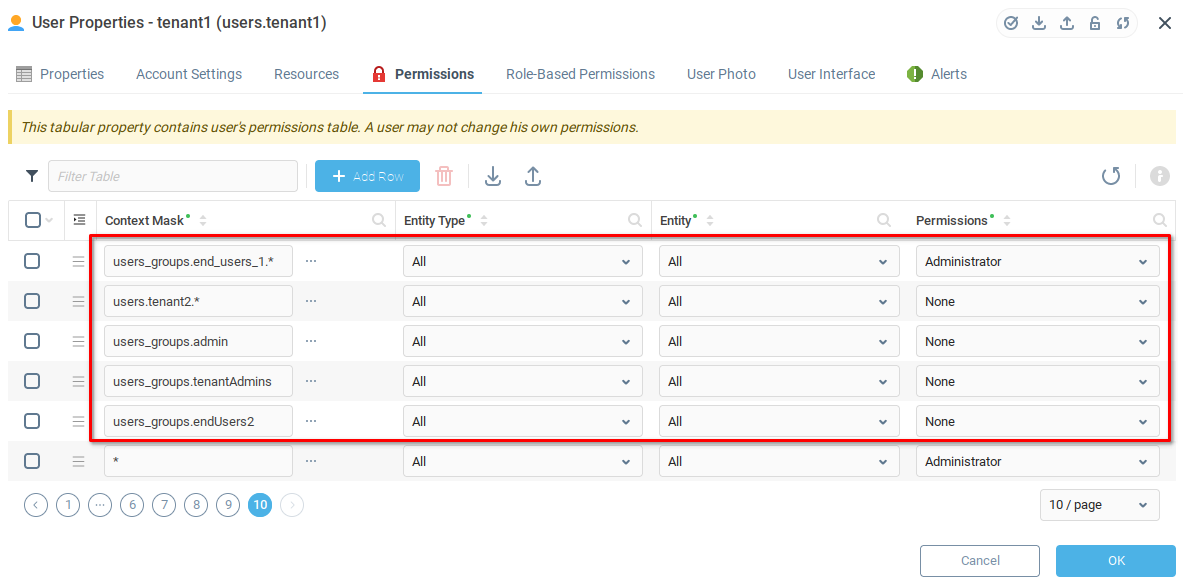
Finally, we will prohibit the tenant1 user from viewing the Admin user, other Tenant users or their user groups. To do this, we add the following records with Permissions set to None:
users.tenant2.*(This record will be necessary when we create the second Tenant Admin in the next steps.)users_groups.adminusers_groups.tenantAdminsusers_groups.endUsers2
We should now have the following rows in our permissions table for tenant1:
Creating End User and a Tenant Admin Level Test Device
We will create devices and end users to illustrate how the permission schemes are implemented.
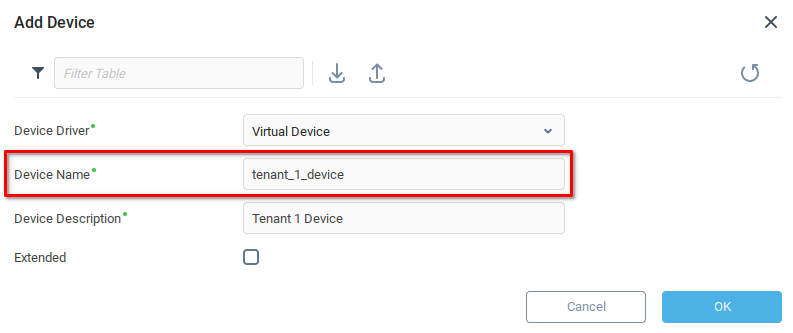
First we log in to the Server as tenant1 and create a virtual device as described in Step 1, naming it tenant_1_device.
Create user1 in the End User 1 group.
Set Permissions for Owned Resources as Operator.
Go to user1 User Properties , Permission tab.
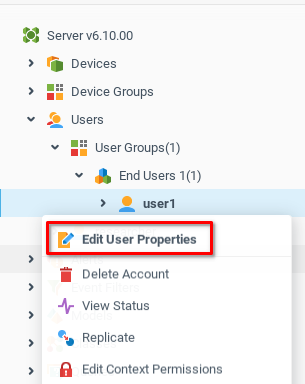
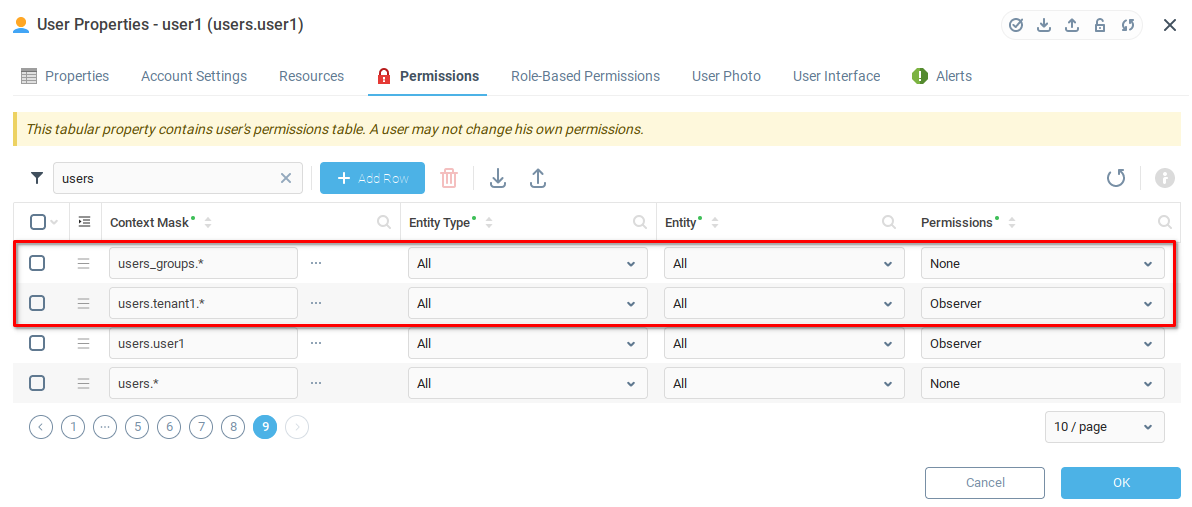
Create the first record users_groups.* with None parameter to prohibit user1 to see info about all other users.
Add record users.tenant1.* next and set its permissions to Observer, to let user1 see all parent resources.
Final Configuration and Result
Now, when you know how to create Tenant Admins and End Users, step-by-step you can add a second branch of the tree with the second Tenant Admin (name it tenant2) and his End User (name it user2). Be careful setting permission for all new users. Use the correct context names, when you want to deny or grant any permission and also observe the row order as shown above, to avoid issues.
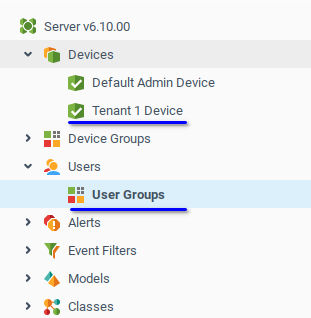
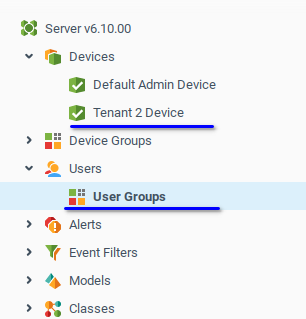
If you do those steps without mistakes, you will get the result shown below.
On the "Admin" administration level, you will see all resources of all users and also will have full access to them.
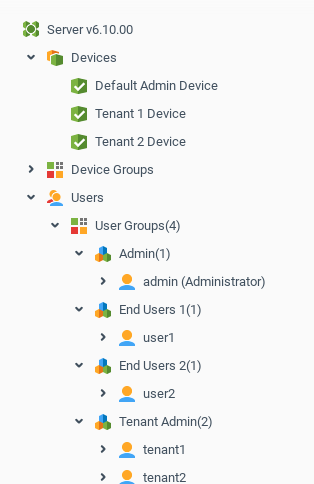
On the Tenant Admin administration level, you will see only current Tenant Admin resources and have full access to the related End User. Admin resources are visible, but cannot be edited.
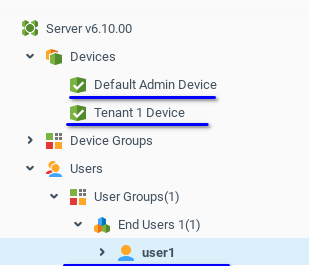
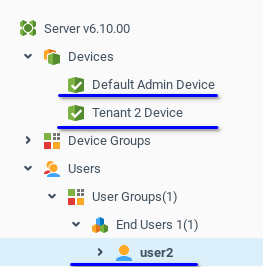
On the End User administration level, all resources of higher levels are also visible, but cannot be edited.
Was this page helpful?