Using Classes to Manage Databases
Iotellect deployed in a complex enterprise IT environment often needs to manage and make use of data stored in an external database. This tutorial shows how to connect to an external SQL database and build a custom UI for searching, filtering, creating, editing and deleting records using Classes.
In this tutorial, we will use classes to manage a table in an external MySQL database that holds RFID cards data. This cards database can be used to authorize users via diverse RFID-enabled access control devices. The authorization can be also performed through Iotellect, but this feature is out of this tutorial's scope.
Connecting to an External Database
Iotellect offers a number of ways to connect to utilize an external Database. The SQL database device can connect with a number of different database types (not just SQL) to read and write data by sending queries directly to a remote database.
While this is an option for very granular control over database elements, Iotellect an intuitive system for database management using classes.
We have an external database running on our test machine, with the following parameters:
MySQL version 5.7
Running on
localhostand listening on port3306User
roothas permission to connect remotely.Database named
testing
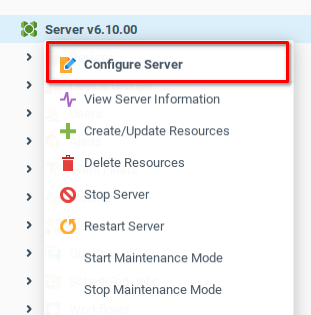
From the server Context Menu we open the Configure Server option:
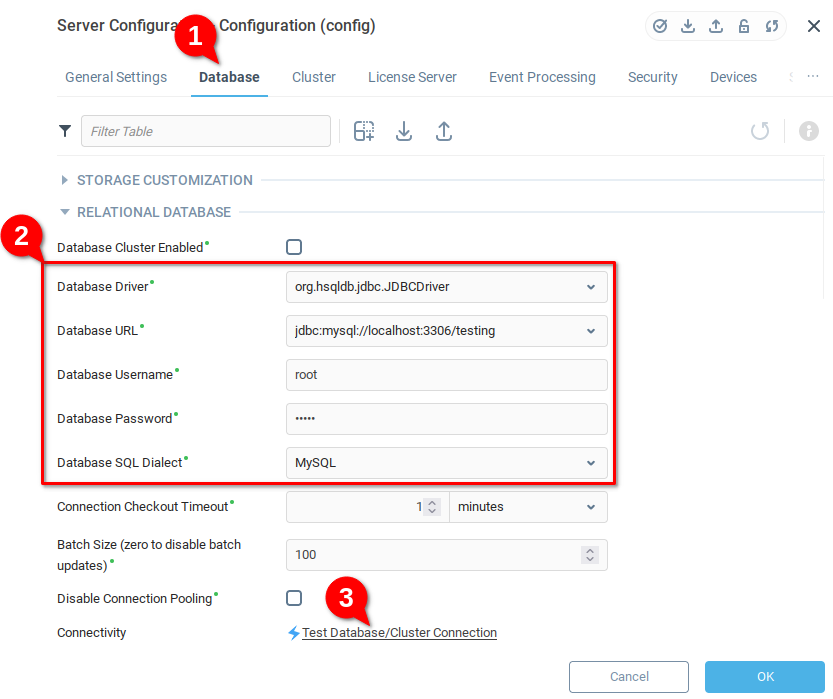
We navigate to the Database tab (1) and assign the appropriate values for our external database (2), finally confirming that the connection was established (3). If necessary, we restart our Iotellect server.
Creating a Class
A Class will serve as an intuitive way for us to interact with the remote database. Each class instance exists as a either a table in a relational database, or a node in a graph database. In our example we’re using a relational database (MySQL) so we will expect to find our class instances as tables when we inspect our database using other database tools.
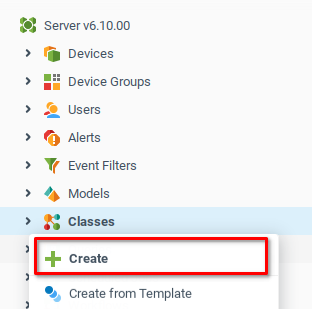
From the system tree, we open the Classes context menu and select Create
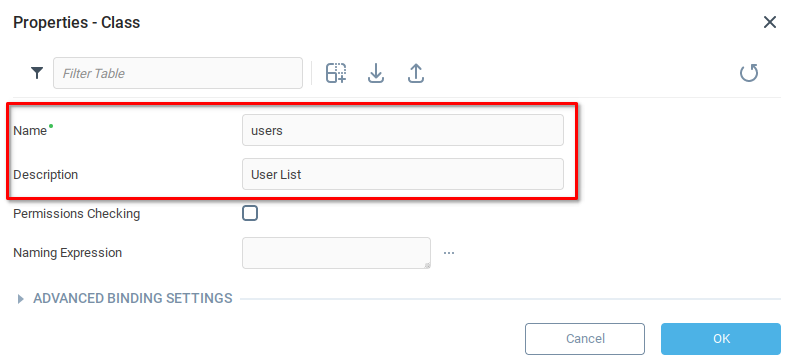
This opens the class properties dialogue, where we can name our new class. We’re going to be managing a list of users, so we Name our class users and give the Description as User List and click OK to save.
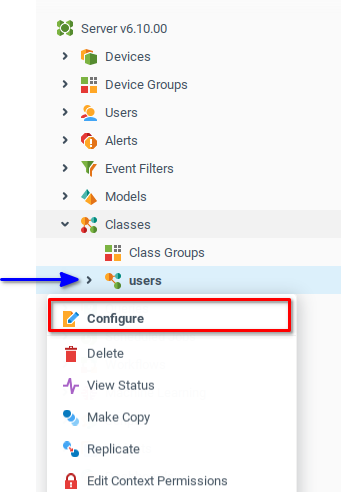
After saving, we see that our users class has been created. We open the context menu and select Configure.
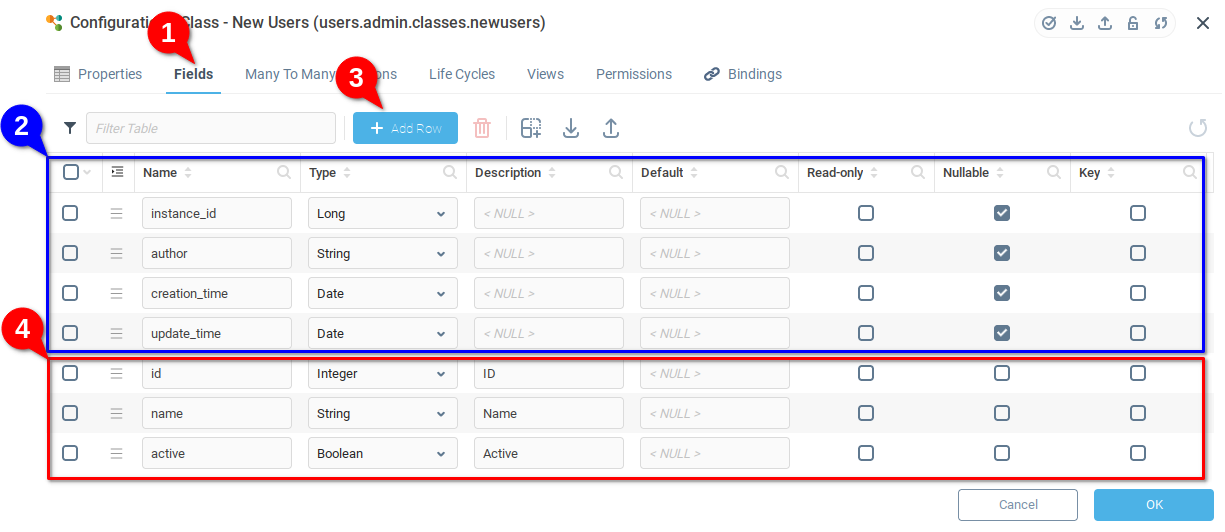
From the configuration menu, we navigate to the Fields tab (1) where we will describe the data elements which we will store in our classes. Because we are using a relational database, these fields correspond to columns in our table users. We see that there are a few rows already created (2), which are the default fields which Iotellect will use to manage our table. Editing or removing these default fields will lead to unpredictable results.
We Add Row (3) to create three new columns: id, name, and active which we will be using to store our data. We set the respective types as string, integer and boolean and give descriptions for each field (3).
Inspecting the testing database from third party software, we see that the table users has been created:
mysql> use testing;
Database changed
mysql> desc users;
+---------------+--------------+------+-----+---------+-------+
| Field         | Type         | Null | Key | Default | Extra |
+---------------+--------------+------+-----+---------+-------+
| CREATION_TIME | timestamp    | YES  |     | NULL    |       |
| UPDATE_TIME   | timestamp    | YES  |     | NULL    |       |
| AUTHOR        | varchar(100) | YES  |     | NULL    |       |
| INSTANCE_ID   | bigint(20)   | NO   | PRI | NULL    |       |
| ACTIVE        | bit(1)       | NO   |     | NULL    |       |
| ID            | int(11)      | NO   |     | NULL    |       |
| NAME          | varchar(100) | NO   |     | NULL    |       |
+---------------+--------------+------+-----+---------+-------+In order to make data from this table accessible, we will need to add at least one view. Again opening the class configurations, navigate to the Views (1) tab and Add Row (2). We add two rows, which we label all_users and active_users and give descriptive text (3).
We are creating two views, one which will show all records of the database, and another which will only show active records. We see that each view automatically shows all columns, so we will open the Columns sub-menu (4) to remove the ACTIVE column, and then from the Filter sub-menu (5) we will add a filter to only show rows where the value of the ACTIVE column is TRUE.

Editing Which Columns Are Shown in Views
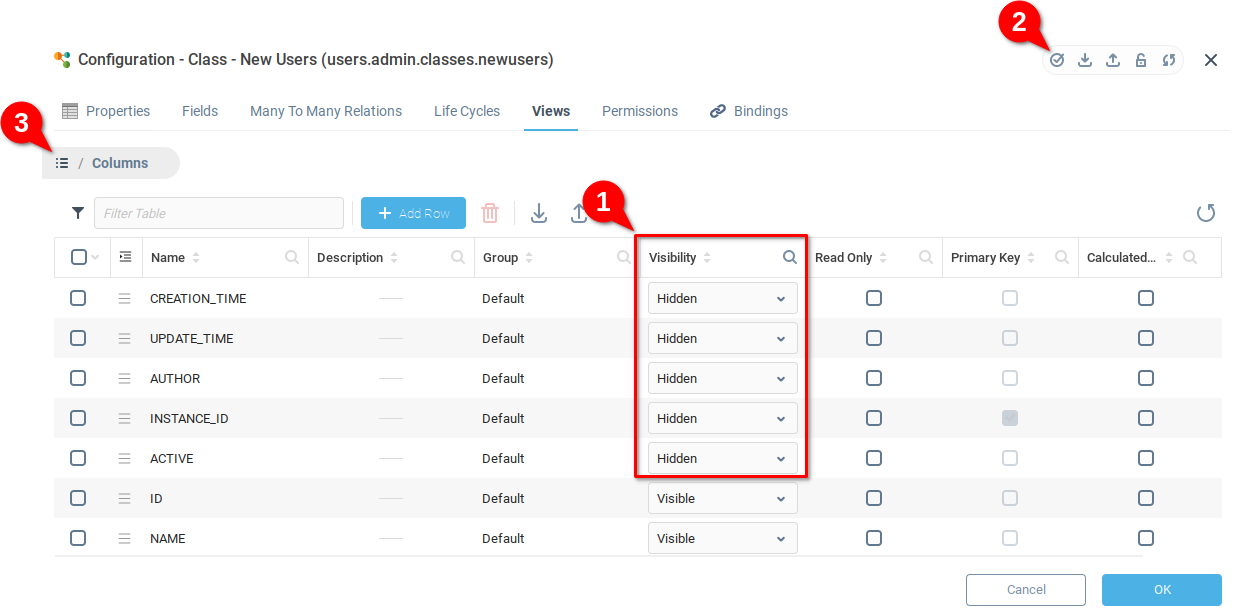
From the Columns sub-menu, we set the Visibility of the default columns, as well as our custom column ACTIVE to “Hidden” (1), save our action (2) and then return to the Views menu (3).
Filtering Which Rows Are Shown in a Given View
From the Filter sub-menu, we add a row (1) and select the filter column ACTIVE and the target value as TRUE (2). As above, we save (3) and return to the views menu (4)

Returning to the Views tab, we see that our filter is visible in the Filter column.

Designing Data Search and UI Management
To interact with our class, we will build a Dashboard [LINK] interface showing how to interact with the class. Our purpose is to explore a simple way to interact with Classes using a dashboard. Further tutorials will expand on class usages and designing complex UIs.
Our simple Dashboard will have two components both of the “Class Data Table” type. First we select the Component Palette (1) and drag two “Class Data Table” components into the grid cells (2).
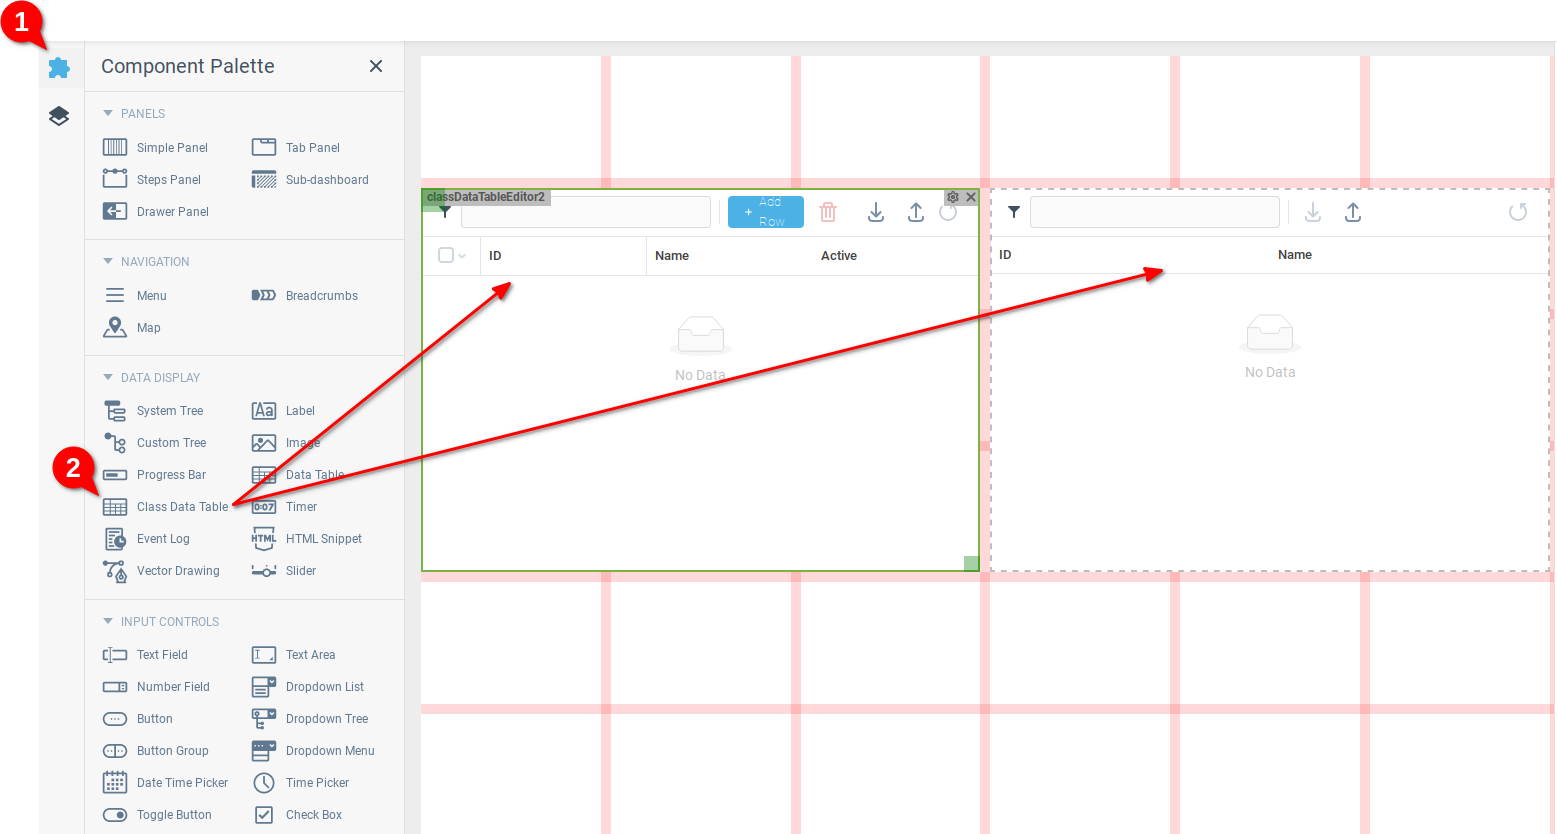
Of course in practice, the UI probably needs to be more detailed, depending on the use case.
Connecting the Components to the Class
Here we will connect our Class Data Tables to our User List Class, which will allow us to interact with the data being managed by the class.
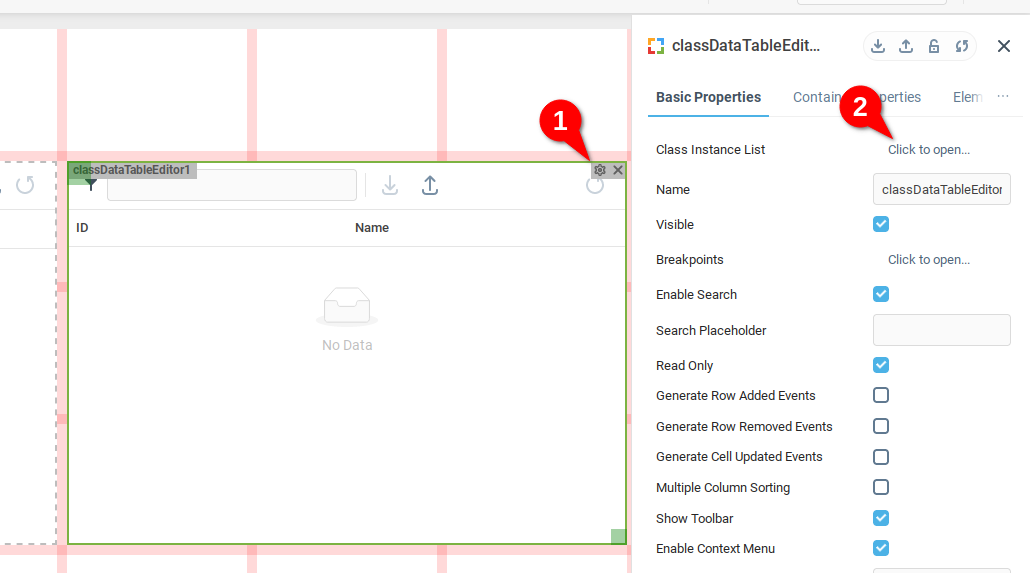
We select the Properties Editor (1) for one data table, and then open the Class Instance List property (2)
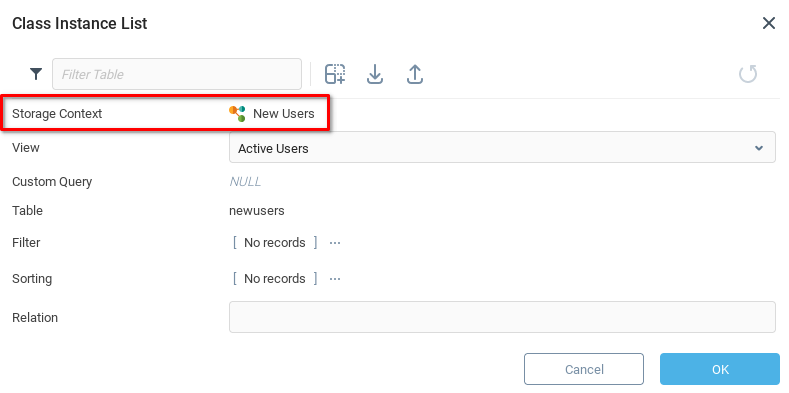
From the Class Instance List dialogue we open the Storage Context dialogue.
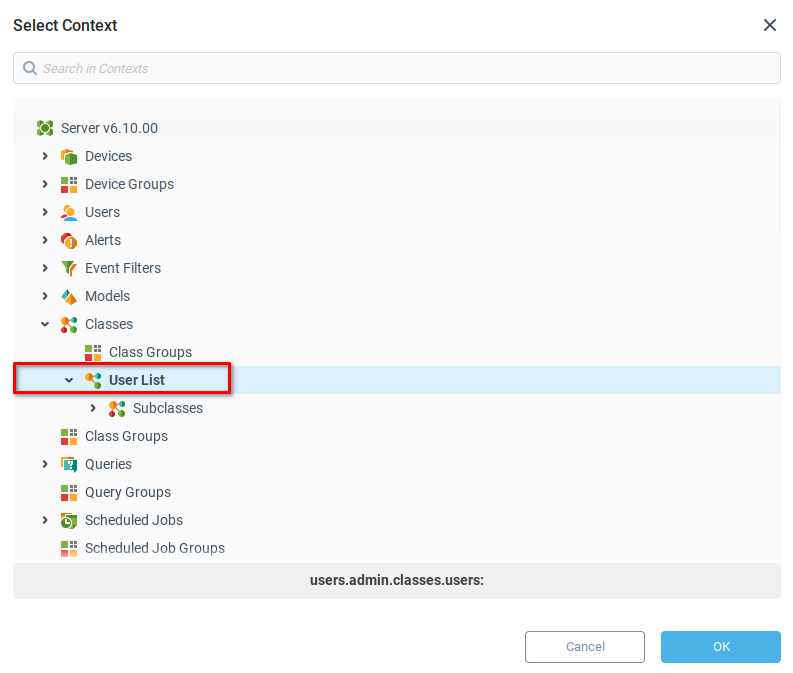
This opens up a Select Context dialogue, from which we choose the context of our Class User List and click OK to save.
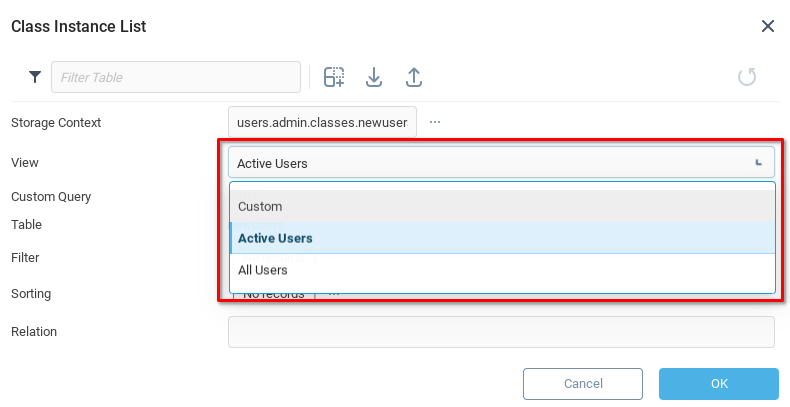
Returning to the Class Instance List we’re able to select a view for our table. In this case we will select Active Users view, meaning that results displayed in this table will be filtered to only include entries where the the ACTIVEvalue is True.
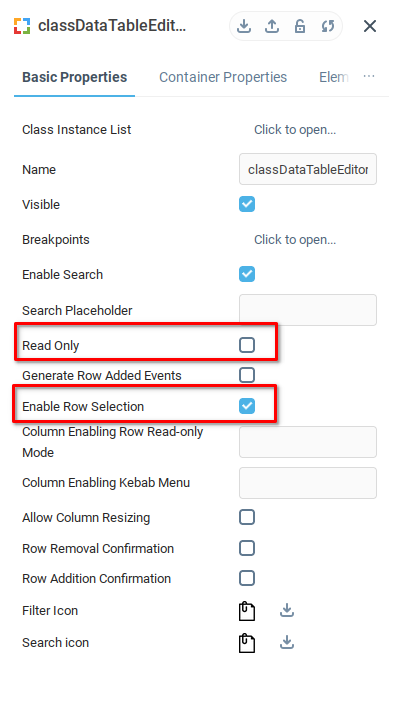
We repeat the above steps for the second Class Data Table component, except we select the All Users view and from the properties menu we set Read Only to False and Enable Row Selection to True
Was this page helpful?