Scheduled Report Emailing
It's often necessary to regularly send reports by e-mail. For example, company executives might want to receive IT equipment failure statistics every month. The Iotellect administrator may send the report by e-mail manually, but it would be much more effective to schedule periodic report emailing for automatic execution using Iotellect Server job scheduler. This tutorial explains how to create a scheduled task that emails reports.
 | To send report manually, execute Send Report by E-mail action of Report context. |
1. Adding a Scheduled Job
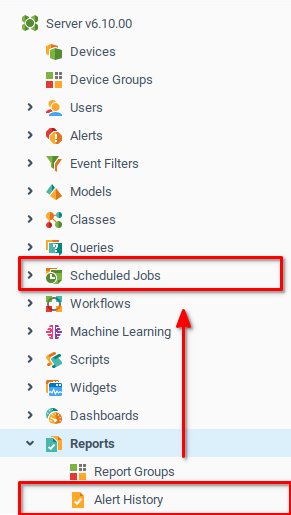
To create a new scheduled task, first find the Report to be automated in System Tree under Reports. Drag and drop it on the Scheduled Jobs node and select "Schedule New Job" from the context menu:

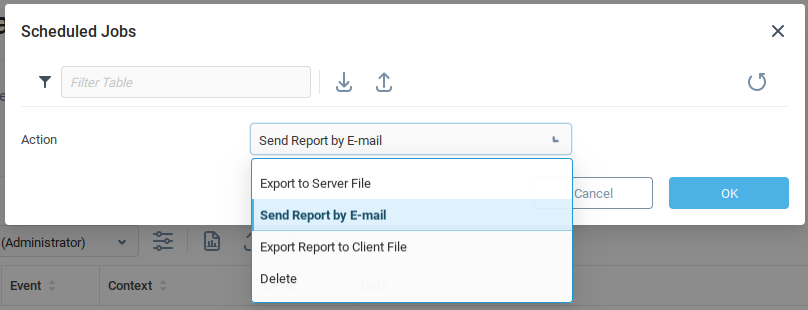
Select Send Report by E-mail from the list of actions that may be scheduled:

Click OK. Now define the properties for the new scheduler job. Enter the job name and description (for example, disk_summary_mailer and Disk Summary Emailing):
Click in Parameters line, and then click in Send Report by E-mail line to open report emailing parameters. Enter e-mail recipients and select the report format.
Click OK to create new scheduled job. It's properties will open in a new dockable window.
2. Defining the Schedule
It's time to add job triggers that will start it at certain time.
In the job properties window, open Advanced Schedule tab. Click on Add Row button to add a new trigger.
Let's configure the job to run every Monday at 10:00 AM. To do that, we need to switch the trigger from working on certain days of month to certain days of week. Click on the Day of Month field to open the day-by-day monthly schedule in a new window.

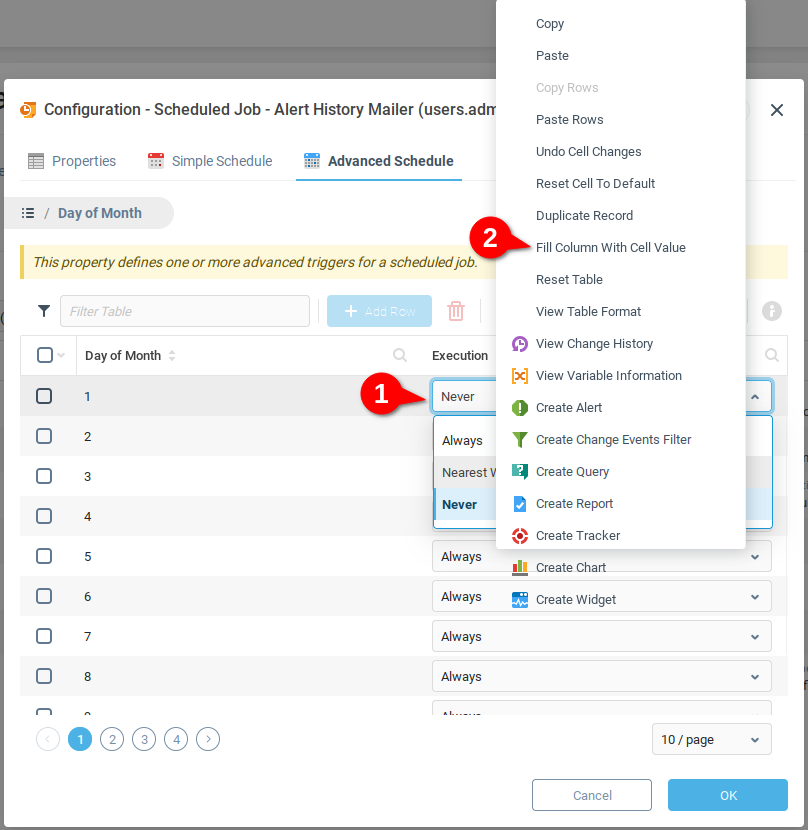
In the day-by-day monthly schedule, select Never for the first day, right-click in the same cell and select Fill Column With Cell Value from context menu. Click the menu root icon to return to the Advanced Schedule table.

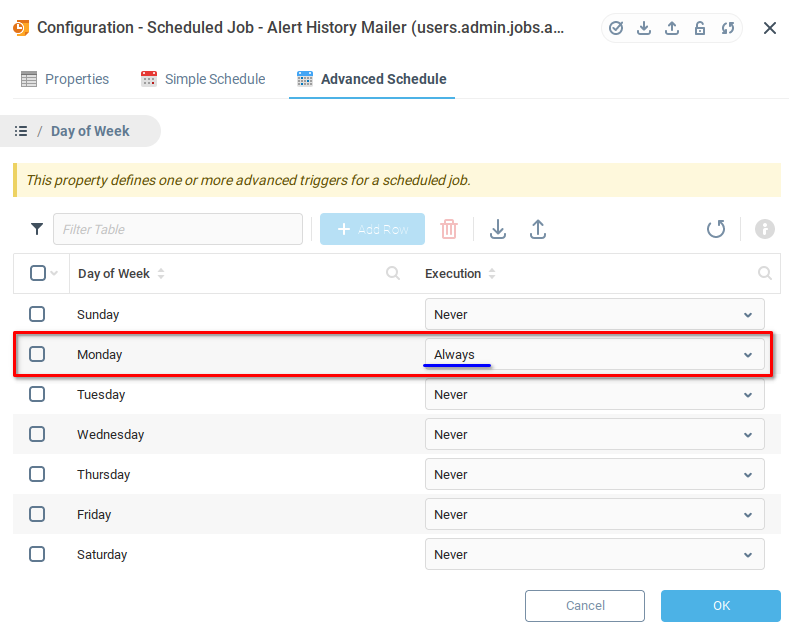
Now click in Day Of Week field. In the displayed table, change Monday's Execution to Always, and click menu root icon to continue.

Finally, change the Time parameter of the job to trigger to 10:00:00:

When done, click on Save Properties. Your scheduled job is ready now and you may expect the report to be sent next Monday at 10:00.
Was this page helpful?