Using Selectors
Since most Iotellect web UI components are much more than just a couple of HTML elements, it’s inevitable that at some point you will find yourself at the spot when a list of plain CSS properties isn’t enough to reach every part of the component to style. In those cases, you need to use CSS selectors wrapping the properties to specify what component part exactly you intend to style.
 | In CSS, selectors are used to target the HTML elements on web pages that are subject to style. A CSS selector is a pattern of elements and other terms that tell the browser which HTML elements should be selected to have the CSS property values inside the rule applied to them. |
Selector Composition
A typical selector consists of at least one element and applies to anything within the HTML document that comply with the rule. It looks like this:
selector {
    property: value;
}A selector could be any of the following or a combination of them:
Type | The name of an HTML tag. Always comes first in a combined selector, e.g. |
Class | Value of the Written with a period ( |
ID | Value of the Written with a hash ( |
Attribute | Any attribute, either an officially supported or a custom one. Written inside square brackets ( |
In addition, there are pseudo-classes and pseudo-elements to fine-tune the rules and even generate HTML elements from nothing.
To construct a selector from more than one element, combinators are used, which are basically single symbols placed between the elements to specify their relations. There are four of them:
Descendant ( | Refers to all elements that are descendants (any level deep) of a specified element. |
Child ( | Refers to all elements that are the children (direct descendants) of a specified element. |
Adjacent sibling ( | Refers to an element that is directly after a specified element. |
General sibling ( | Refers to all elements that are next siblings of a specified element. |
For example,
#elementID div.elementClass > h2 + img[alt=”Hello there”] ~ span:last-of-typeselector will cause styles to be applied to the last <span> tag among elements after an <img> tag containing an alt attribute with the “Hello there" value that is right next to an <h2> tag, which is directly inside a <div> with the elementClass class attribute, and all of this is on any level inside the element having the ID attribute value of #elementID.
Several different selectors could be written consequently using a comma to separate them:
selector01, selector02 {
    property: value;
}In that case CSS properties listed within the rule will apply to all elements that match any of those selectors.
Selector Specificity
Depending on the type of elements it’s composed of and their amount, a selector has a certain specificity and the resulting weight.
| Specificity in CSS is the algorithm used by browsers to determine the CSS rule that is the most relevant to an element, hence, determines the property value to apply to the element. The specificity results in the weight of a CSS selector to determine which rule from competing CSS declarations gets applied to an element. |
Selector weight categories by decreasing their value:
ID. Includes
#idselectors.CLASS. Includes
.classand[attribute]selectors, plus pseudo-classes.TYPE. Includes
typeselectors and pseudo-elements.No value. The universal selector (
*) and the pseudo-class:where()aren't counted when calculating the weight.
To calculate a selector’s weight, add one point to the ID - CLASS - TYPE formula for each element in its category used to compose the selector.
The selector with the most points in the most prioritized category wins the race if competing with other selectors for being applied. If there are several selectors with the same weight, the one that has more points in the next prioritized categories wins. If there are several of those too, the last declared one is applied.
 | When the resulting CSS for a component being compiled on the dashboard render, your custom styles are always considered the last declared. |
So, for example,
#elementIDselector has specificity 1-0-0 and
div.classname01 > .classname02.classname03 span:first-of-type + [id="elementID"]selector has specificity 0-5-2 (as its ID is written as a type selector).
Because the first one has 1 point in the ID category, 5 points in CLASS and 2 points in TYPE for the second one don’t matter while it has zero ID elements in it. The #elementID selector wins despite the fact that it consists only of one element.
| Keep in mind that one of the component’s auto-generated classes is added at the beginning of your rule when the resulting CSS is compiled, which increases its weight in the CLASS category by 1. |
Targeting Selectors
To find the right element to target with a CSS rule if plain styles don’t achieve the goal, use web developer tools available in all mainstream browsers.
| It is recommended to read the Useful Browser Tools article and the Web Components Structure section first as the best starting point to better understand the topic. |
To ease the struggle of figuring out what inside a component should be addressed with a CSS rule, Inspector Tool along with forcing different DOM elements' states is the best help.
Let’s say you want to change the appearance of the (
In the UI Builder, add a Context List component to the dashboard by clicking on it in the Component Palette or by dragging it to the layout.

Open the browser’s developer tools by pressing
F12on Windows/Linux orOption + ⌘ + Ion Mac. Alternatively, you can right-click on any place at the page and select the Inspect (or similar) option from the appeared context menu.
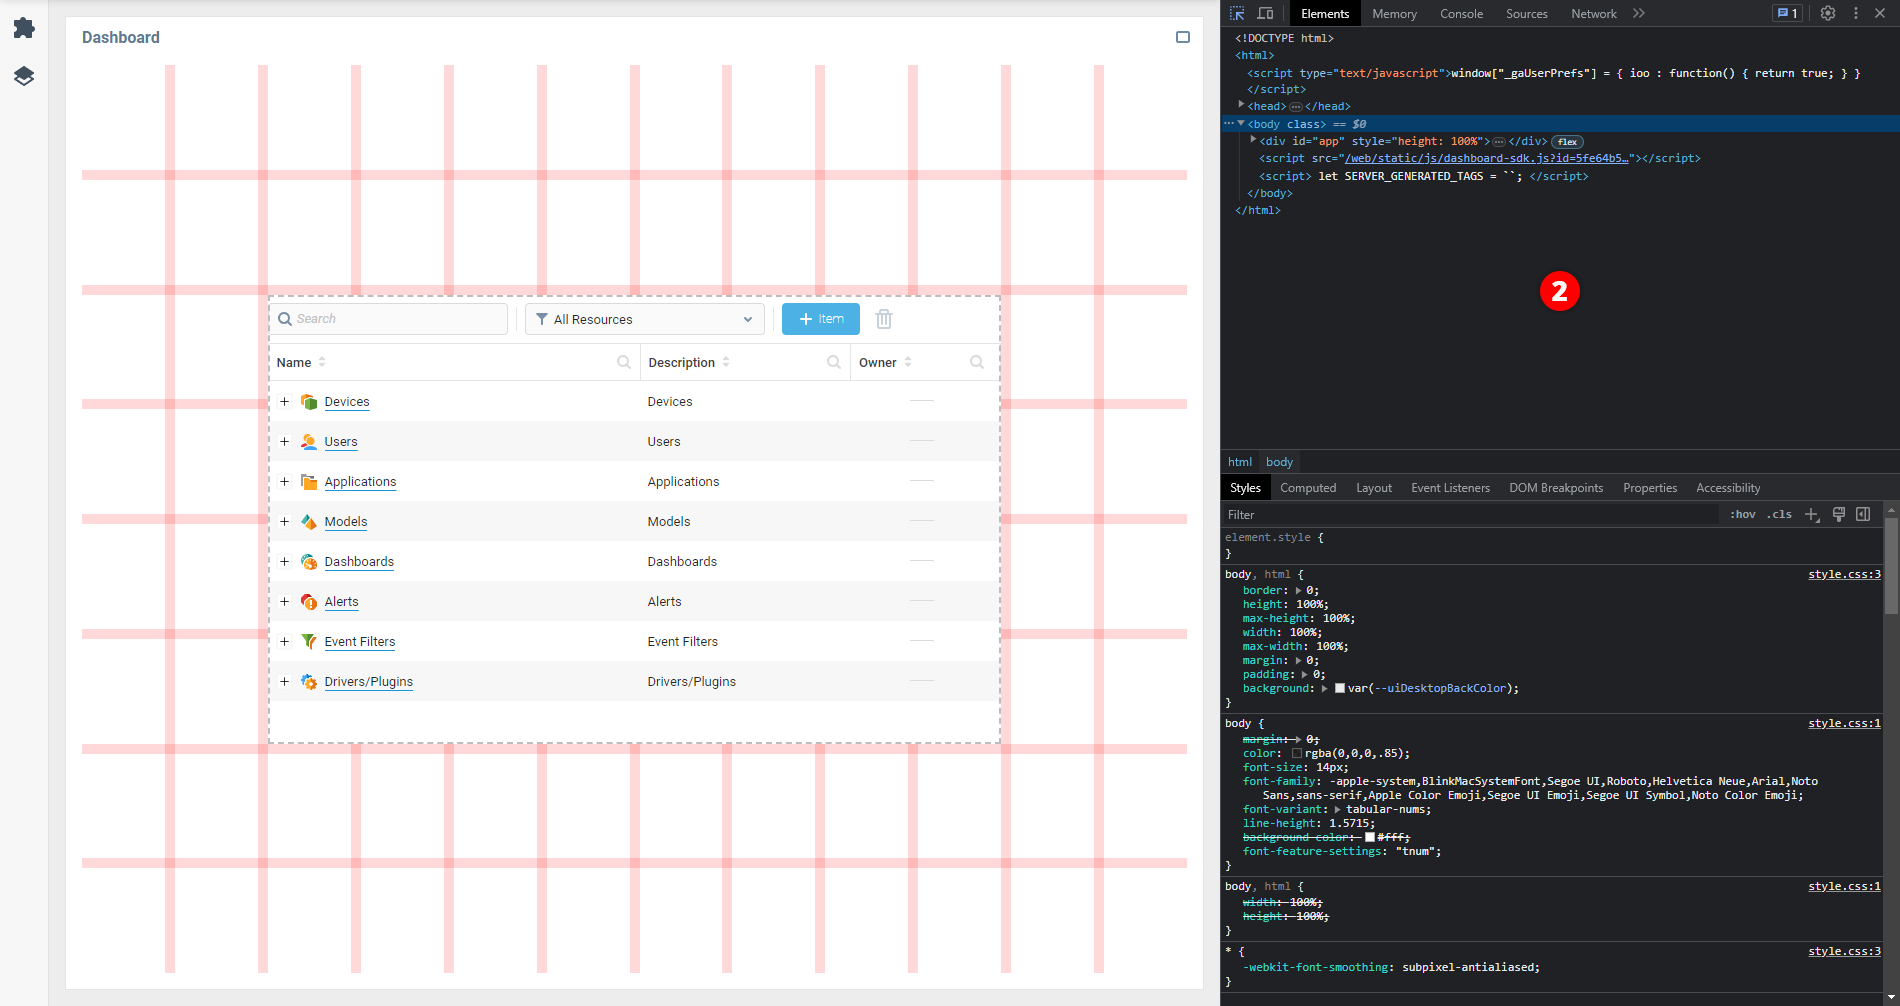
In the developer tools, enable the Inspector Tool available in the top-left corner of the opened window.
Hover over the (
Examine the Style properties of the element highlighted in the document tree. It’s a
<div>element with theclass="component-system-button square toolbar-add-row-button toolbar-button"attribute. Looks like it is indeed the correct element to apply the styles to.
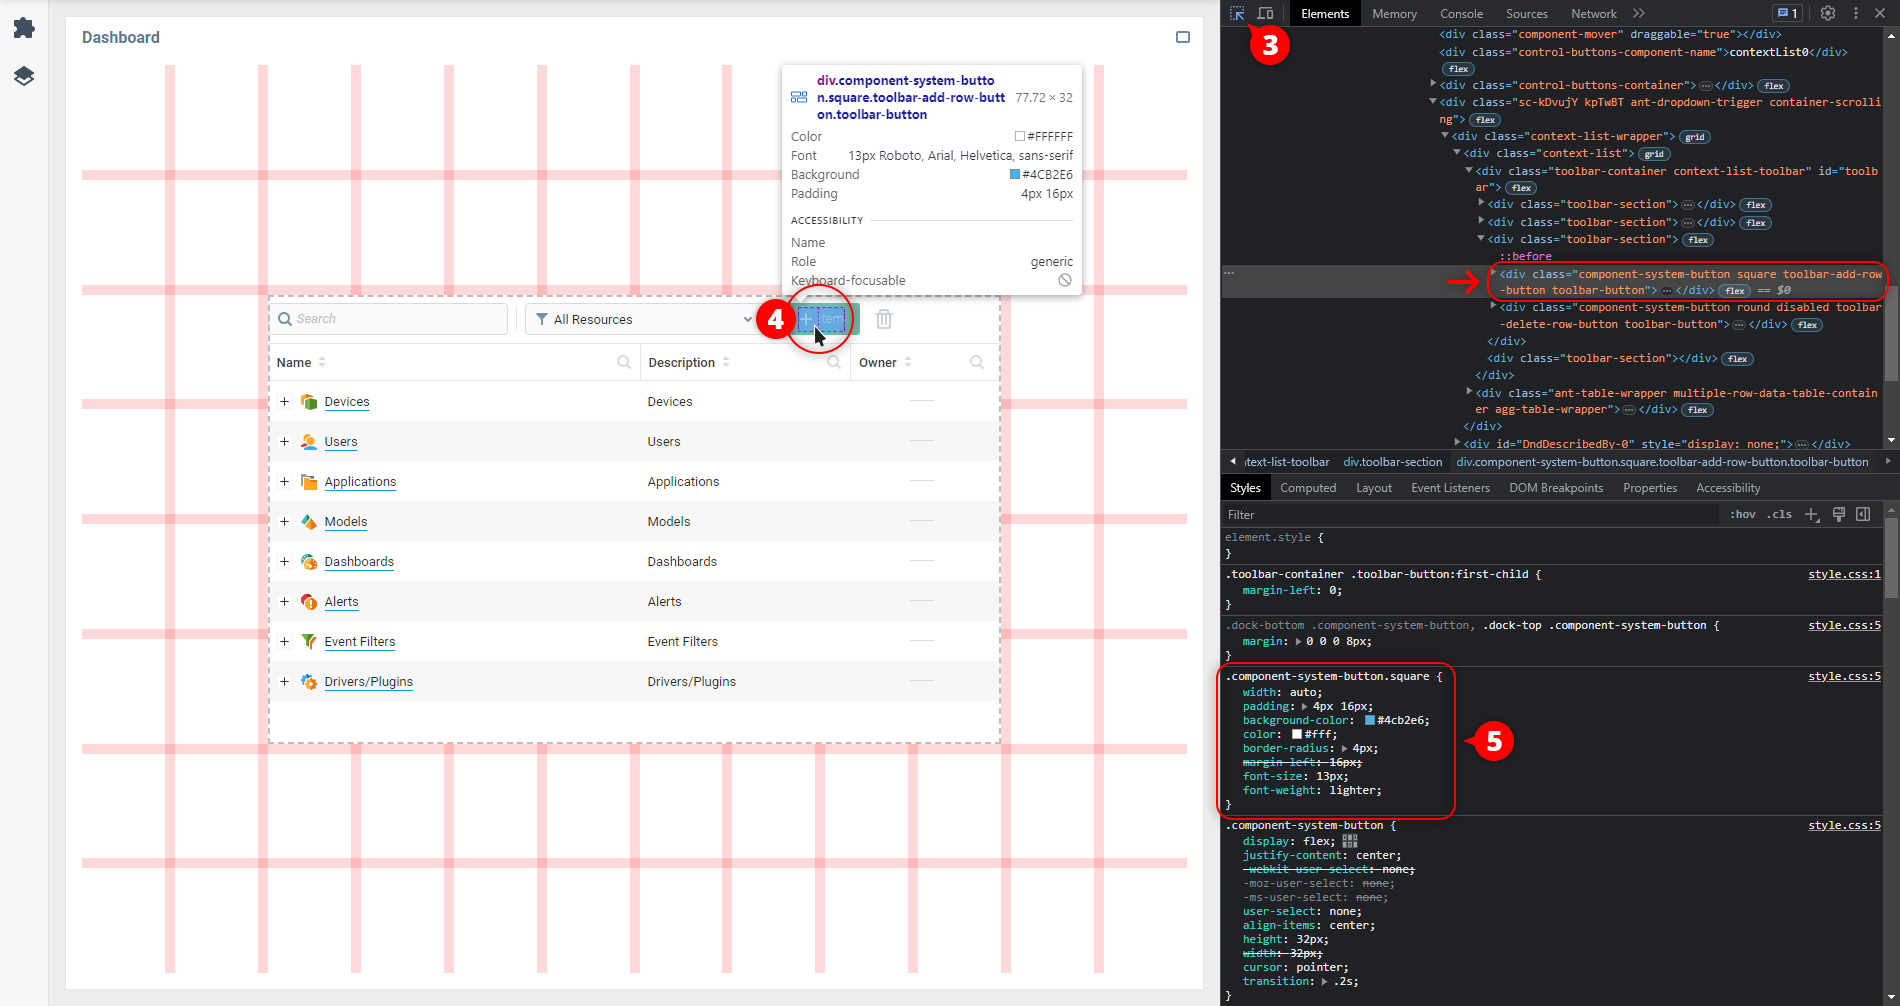
The current element’s appearance mostly comes from the single CSS rule using the .component-system-button.square selector.
To find out what is responsible for the element style in the hovered state, force the state by opening the context menu with the right-click on the element in the document tree and choosing the
:hoverstate from the Force State (or similar) group.
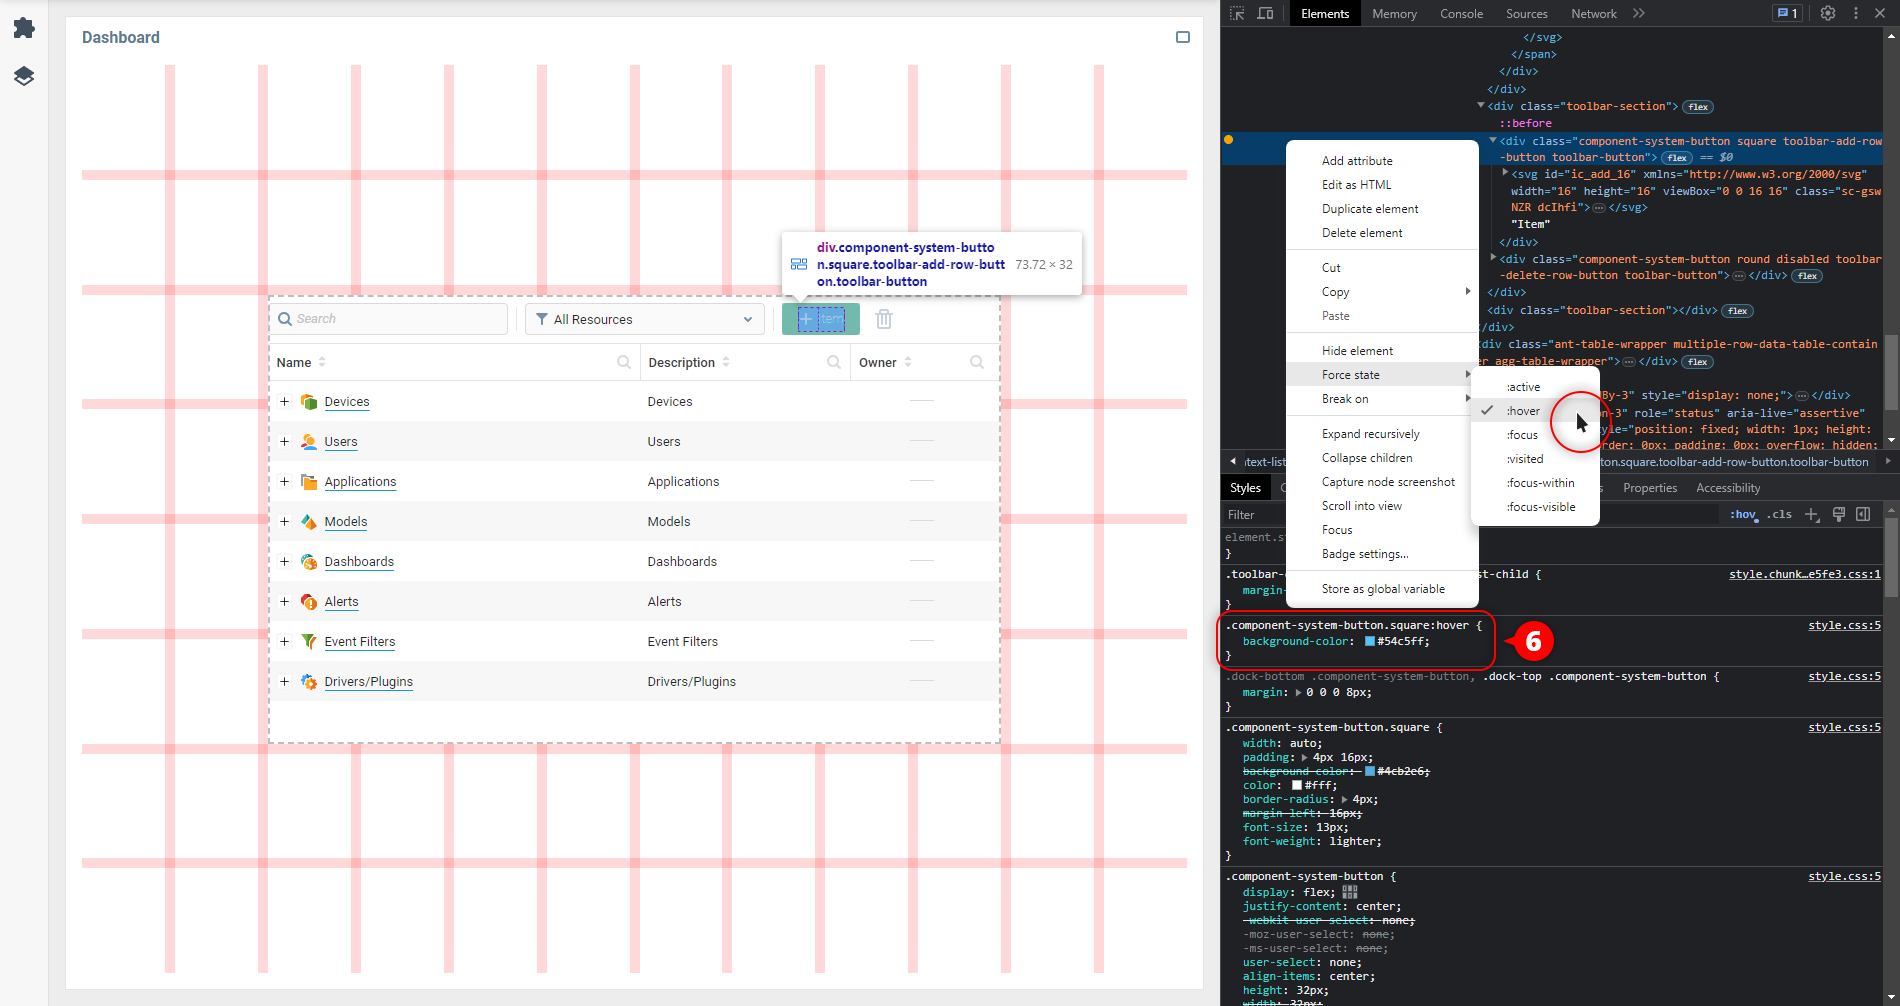
The rule with the .toolbar-container .toolbar-button.square:hover selector appears in the Styles list.
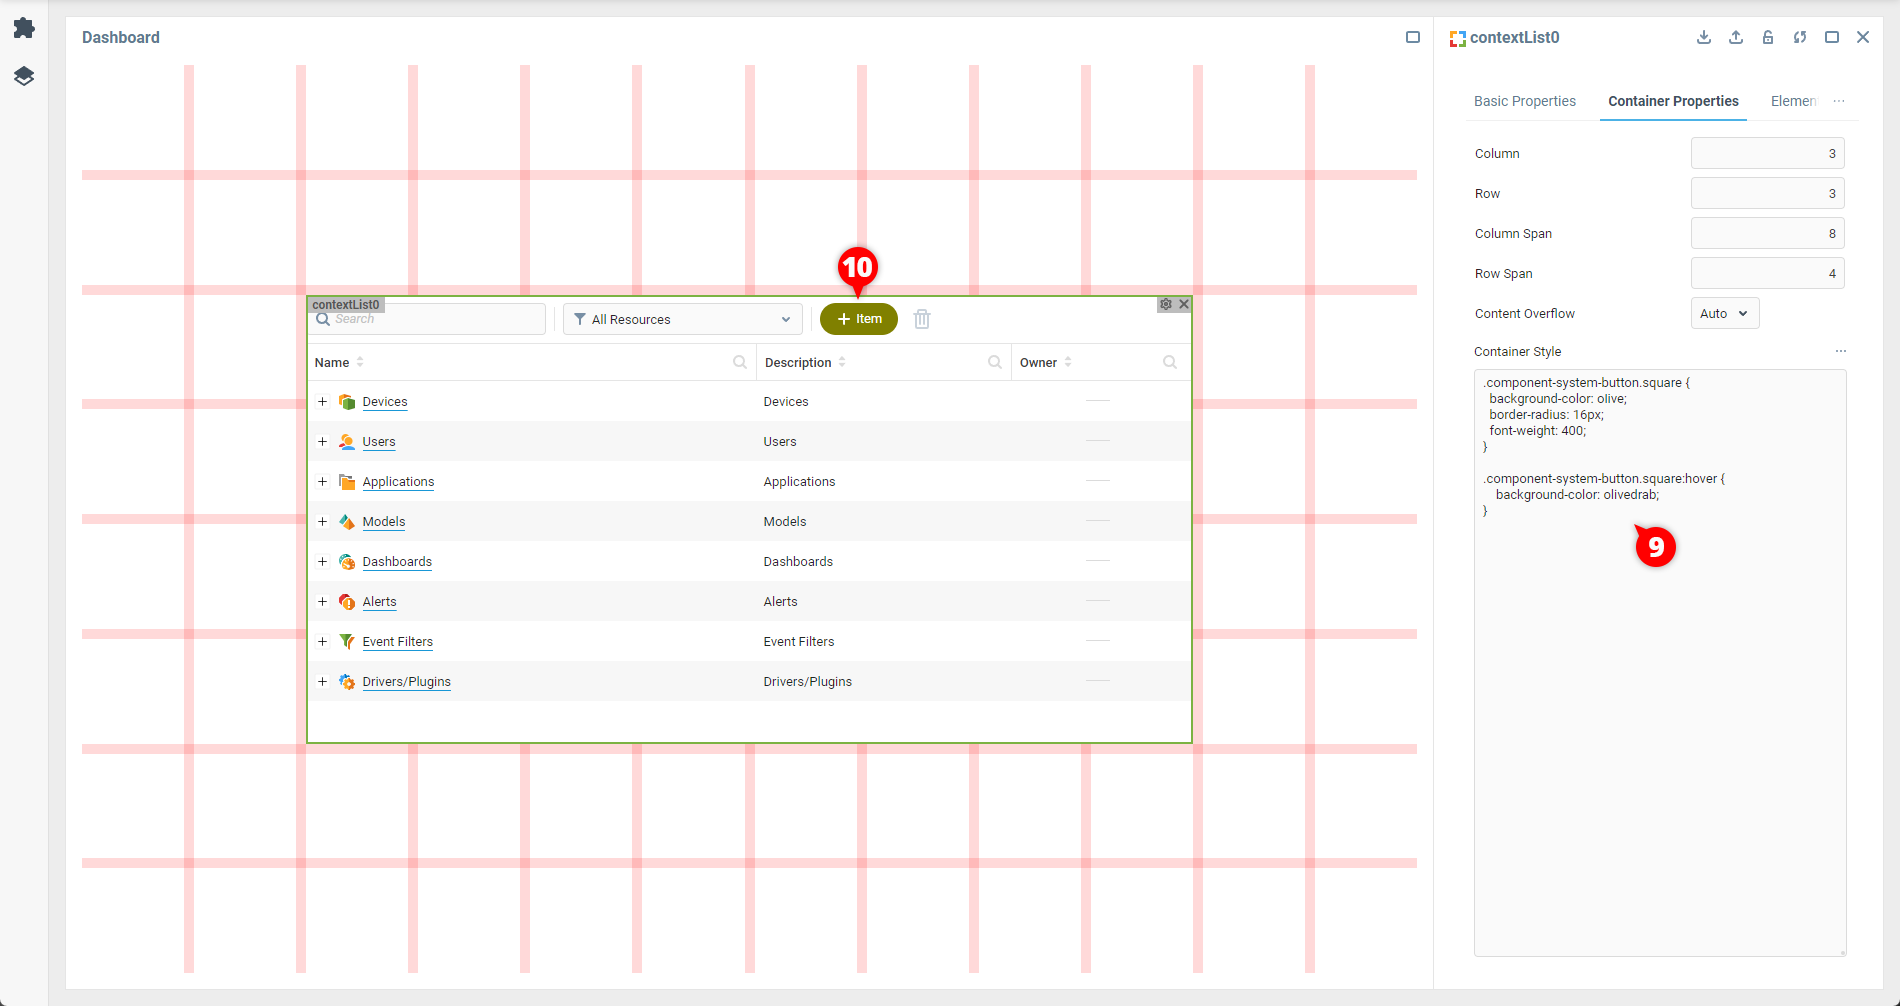
In the UI Builder, open the component Properties Editor by hovering over the component on the layout with the cursor and clicking the (
In the Properties Editor, switch to the Container Properties tab.
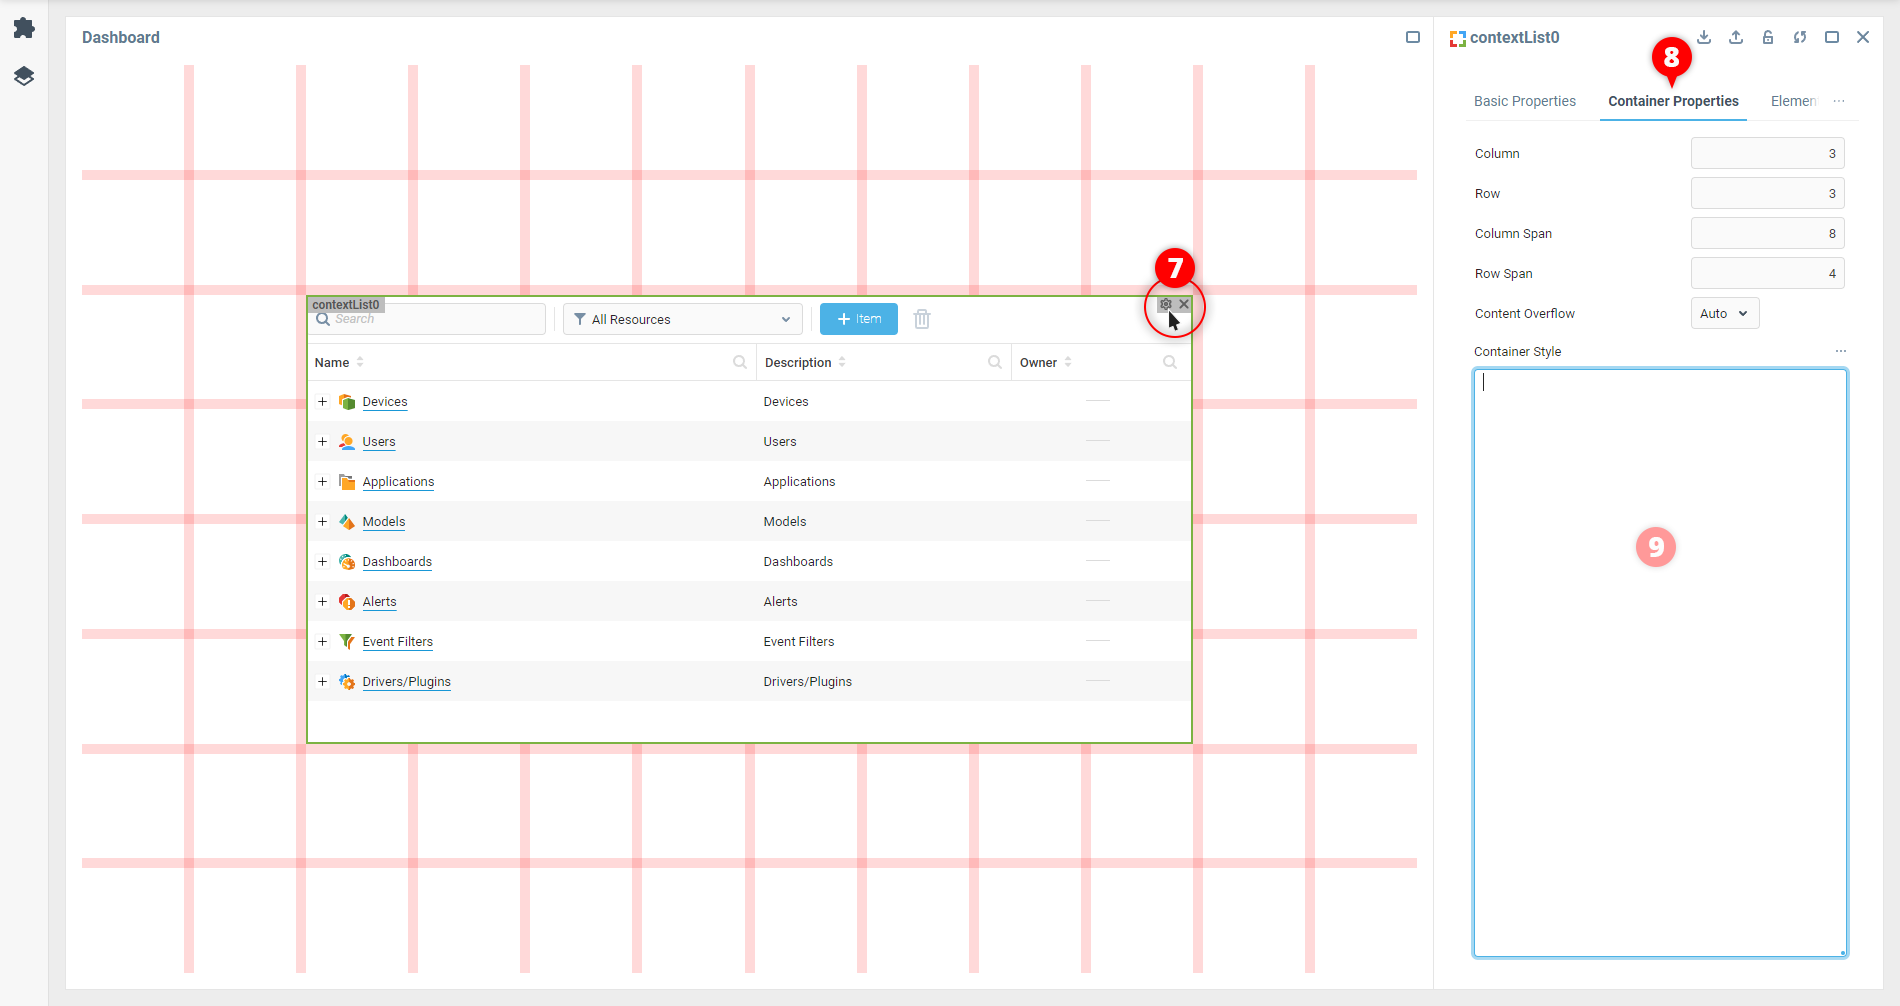
In the Container Properties tab, add the CSS rule with the previously noticed selector to the Container Style property:
.component-system-button.square {
    background-color: olive;
    border-radius: 16px;
}Add the rule for the hover state along the way:
.component-system-button.square:hover {
    background-color: olivedrab;
}You may use the same base selector you used for the uninteracted state in this particular case. Because of an additional auto-generated class being added before the rule on the dashboard compilation, the resulting selector’s weight will be enough to override the default style rule you’ve found using the browser’s developer tools.
The property is applied once the field is out of focus, and the result is visible on the dashboard.
Was this page helpful?