Setting up an External Cassandra Instance
By default, Iotellect Server uses an embedded database engine which can support small and medium sized applications. In cases where you are expecting a large application, and external database or database cluster may be necessary.
Iotellect uses Apache Cassandra for NoSQL storage, while offering a number of different database engines for Relational and Key-Value storage. The following example shows how to deploy a Cassandra instance running in a Docker container.
If you’ve already deployed a Cassandra instance locally, the guide working with an external Cassandra database gives detailed information about how to access and configure the your instance to meet your use case.
Setting up Cassandra in Docker
Docker is a set of products which use virtualized operating systems to distribute software packages as containers. A containerized application typically is defined in terms of an underlying operating system to run the application, libraries and auxiliary software, and the application itself. These applications are distributed as Docker images, which are templates containing instructions for creating a docker container. A container is an isolated place where an application runs without affecting the rest of the system and without the system impacting the application.
Docker Installation
Download a version of Docker Desktop appropriate for the base operating system. The example runs docker on the same machine as Iotellect, however this is not required. Connecting to remote databases is mentioned later in this tutorial.
Starting a Container
This example uses the official Docker Cassandra image. It’s a well documented image, with everything needed to get started. The following commands will be entered in the Linux terminal or Windows Power Shell.
To download the latest cassandra image from the Docker public repository:
docker pull cassandra:latestThe following command will start the container according to certain conditions described below
docker run -d --name cassandra-external -p 9042:9042 -t cassandra:latestEach part of the above command is described below.
Command / Argument | Purpose |
|---|---|
| Command to run Docker |
| Builds a new container based on the provided arguments and options |
| Names the container, in order to make it easier to identify during other operations. |
| Detached flag starts the container in detached state, leaving the terminal free for further commands. |
| Publishes the port |
| Specifies which image to use when creating the container, in this case the latest version of |
After running the command, you will want to check that the container is running correctly. You can use the nodetool utility from inside the docker container with the following command.
docker exec -it cassandra-external nodetool statusThis executes the command nodetool status in the container and displays the result. You should get an output similar to the following:
Datacenter: datacenter1
=======================
Status=Up/Down
|/ State=Normal/Leaving/Joining/Moving
--  Address     Load        Tokens  Owns (effective)  Host ID                               Rack
UN 172.17.0.2 104.31 KiB 16 100.0% 4067c208-7175-4360-be5c-656040979768 rack1You will also want to retrieve the IP address with which to connect to the container. This can be done with the docker inspect command like so:
docker inspect -f '{{range .NetworkSettings.Networks}}{{.IPAddress}}{{end}}' cassandra-external The example container indicates the container IP address is 172.17.0.2. You’re now ready to connect to the database.
Connect Iotellect to the Database
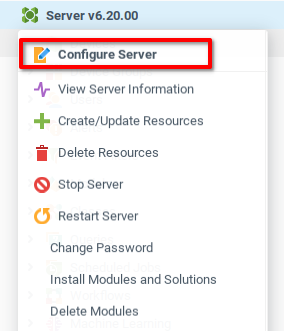
From the web UI of Iotellect, open the server context menu and choose the Configure Server option

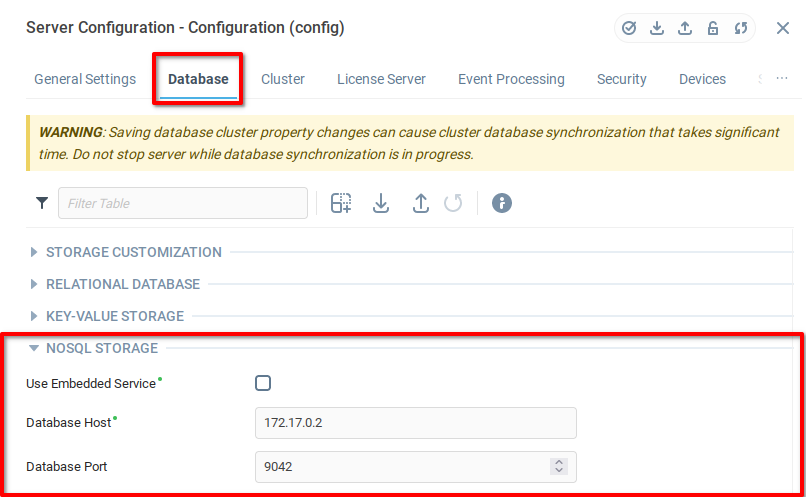
Open the Database tab in the Server Configuration menu, and under NoSQL Storage select the indicated values:
Use Embedded Service -
Falseto indicate that you want to connect to an external database.Database Host - IP address pointing to the Cassandra cluster. In this example
172.17.0.2.Database Port - Port where Cassandra is listening for connections. In this example the default port is used,
9042.

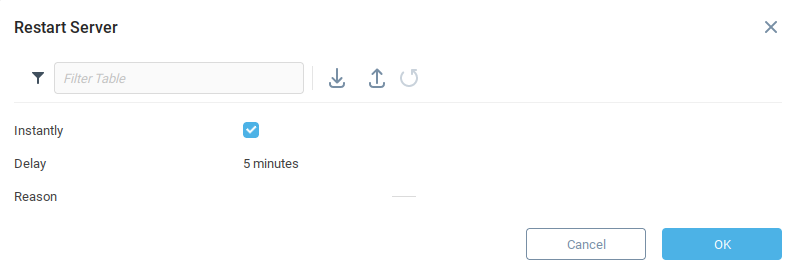
After entering the values, click OK to save and close. You will be prompted to restart Iotellect Server.

When the server restarts, it should connect to the external database.
Directly Accessing the External Database
Now that the Iotellect is running and connected to the Cassandra container, you can enter the container and ensure that events are being written to the database. Similar to how you used notetools previously, you can use docker run to to run the cqlsh tool and query the Cassandra instance:
docker exec -it cassandra-external cqlshThis opens the Cassandra Query Language Shell.
cqlsh>From the CQL shell, you can check that the tables associated with Iotellect were created correctly:
cqlsh> describe tables;Which will show all relevant keyspaces, including the keyspace associated with Iotellect:
Keyspace Iotellect
------------------
ag_alert                 ag_deactivation  ag_netflow_2  ag_properties
ag_attendance            ag_events        ag_netflow_3  context_directory
ag_change                ag_info          ag_netflow_4  rrd
ag_classinstancechanged ag_netflow_1 ag_netflow_5Each table in the keyspace can be queried, the following will show a count of all Iotellect events saved in the database:
cqlsh> select count(*) from Iotellect.ag_events;Further Exercises
Now that your Iotellect instance is connected to an external Cassandra database, you can consider optimizing the database for write heavy operations. This especially relevant if your application requires storing raw variable history for many variables.
Was this page helpful?