Setting up Source Control
Introduction
Once you have created one or more elements of an application you may wish to introduce version control into your workflow. Version control in the context of software development is a way to systematically manage changes to a program. Any individual context in Iotellect can be exported into a single file, allowing that context to be imported into any instance of Iotellect running a compatible version.
In order to allow complex applications to be versioned and managed, Iotellect includes a module Applications which allows any number of contexts to be packaged together, exported, and imported into other Iotellect instances. The following sections introduce you to using the Applications module to manage, export, and import any number of contexts as a coherent whole.
The following demonstration uses the program Git for version control in tandem with the Application module, but you can use any version control program which can manage text files.
Creating an Application
Before creating the Application in Iotellect, create a directory where the server has permissions to write. In the example below the file path is file/path/on/host/machine/app. Choose a path appropriate for your installation.
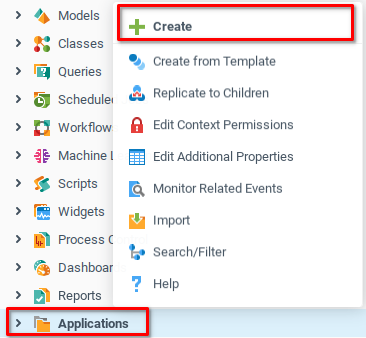
Once a directory has been created on the host machine, navigate to Iotellect interface and open the context menu of the Applications node in the system tree, and choose Create.
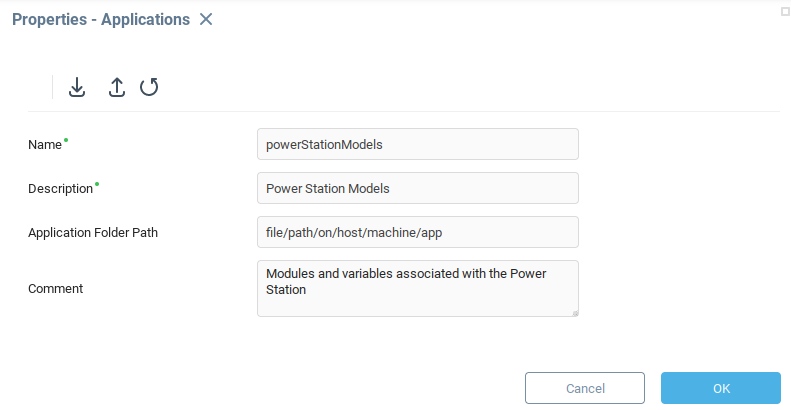
The Properties window opens, where you can provide an appropriate name and description for your application. The example shown will follow from the previous chapters, which are based on the simplified design of a solar power station.
In Application Folder Path, write the path to the directory you created at the beginning, where you would like the application files to be saved. Click OK to create the application and open the configuration window.
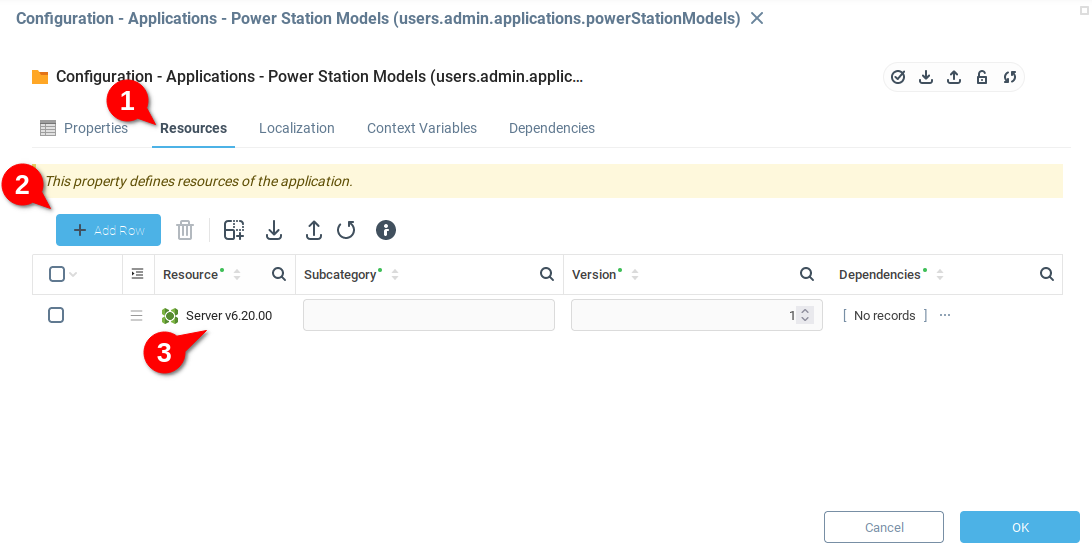
The configuration window offers a number of options. First navigate to the Resources tab (1), Add a row to the table (2) and click on the root context in the Resources field (3).
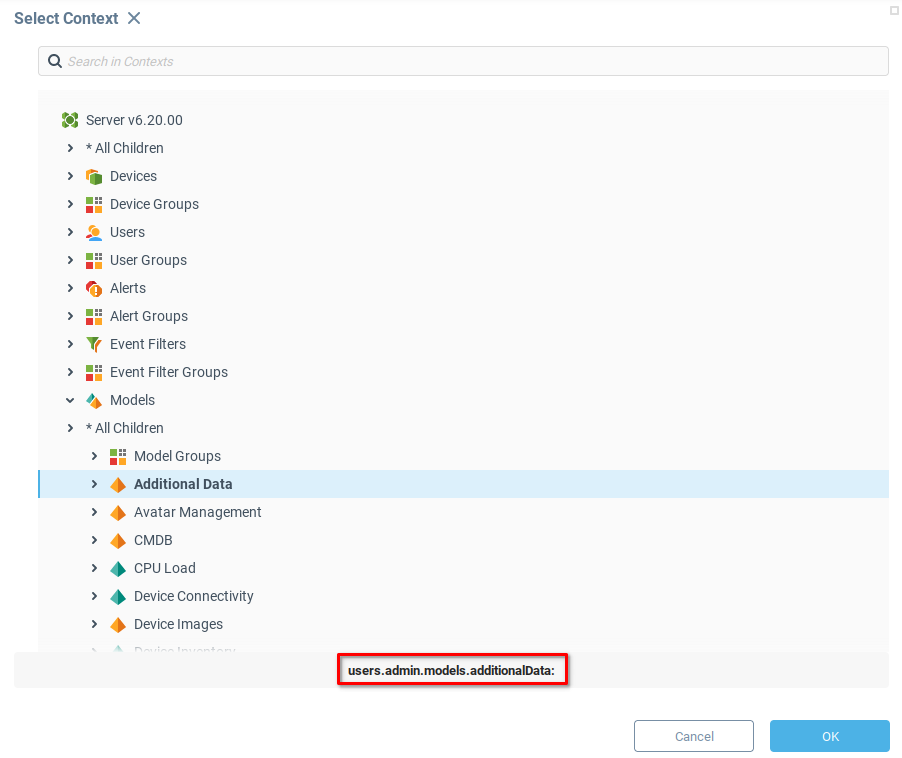
Clicking on the root context in the Resources field changes the input slightly and gives the option to directly enter a context path, or select a context from a list. Click the indicated icon to open the context selection menu.

The first resource to capture is the Additional Data model which was created in a previous chapter to store variables which aren’t associated with a particular device. Open the Models node in the context tree to find this model. Once a node is selected its context path is displayed. Click OK to select this model.
You can now see that the Additional Data model is selected as the target resource. For now, Subcategory can be ignored. This is the first version of the application, so Version will remain 1. Leave Dependencies blank, since this model doesn’t have any dependencies.

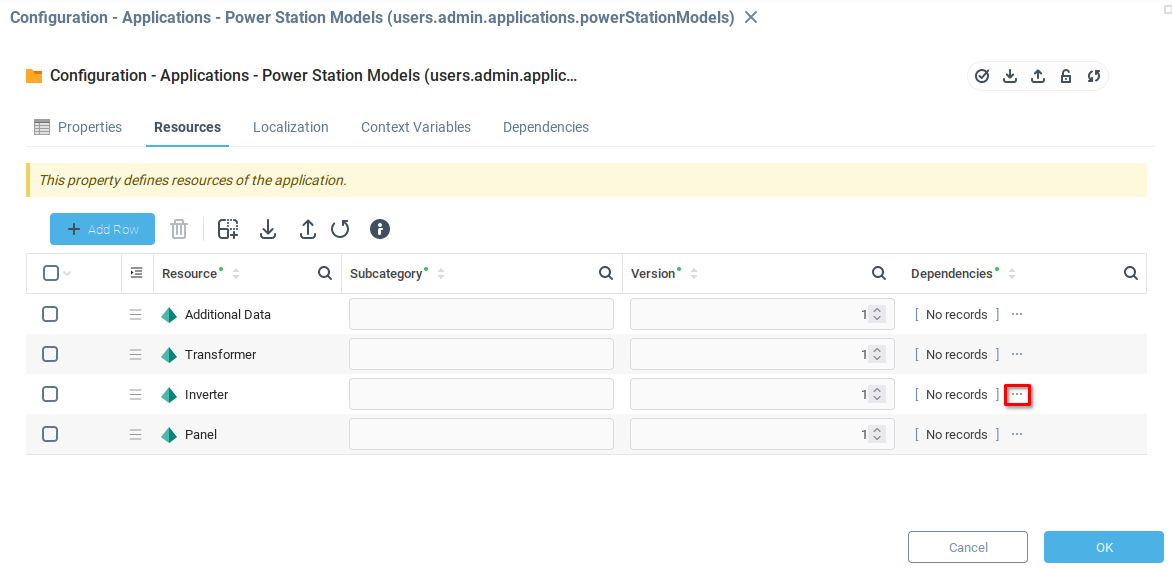
Similarly, add rows for the Transformer, Inverter and Panel models. Recalling from the previous tutorial, inverters are dependent on transformers, and panels are dependent on inverters. Open the Dependencies field for inverters by clicking the indicated icon, opening a data table for describing dependencies.
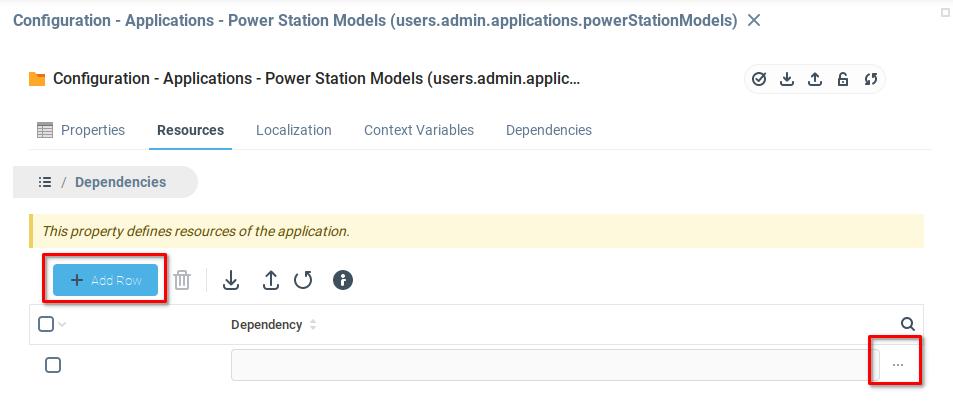
Add a row to the Dependencies table, and open the context selection menu.
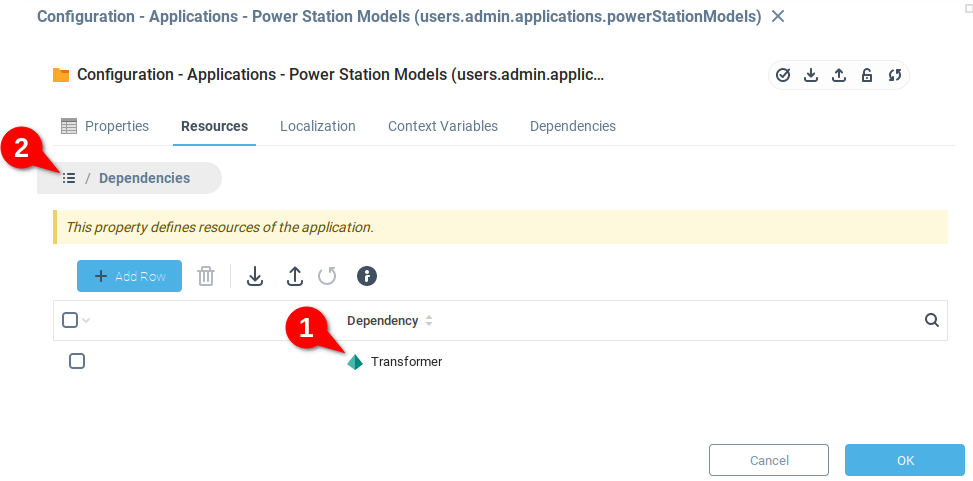
Select the Transform model from the context menu and click OK. You should now see Transformer listed as a dependency (1). Click on menu icon (2) to return to the resource list.
The Resources table now indicates the Transformer model as dependency of the Inverter model. Now add the Transformer and Inverter as dependencies of the Panel model. The configuration window should look similar to the below.
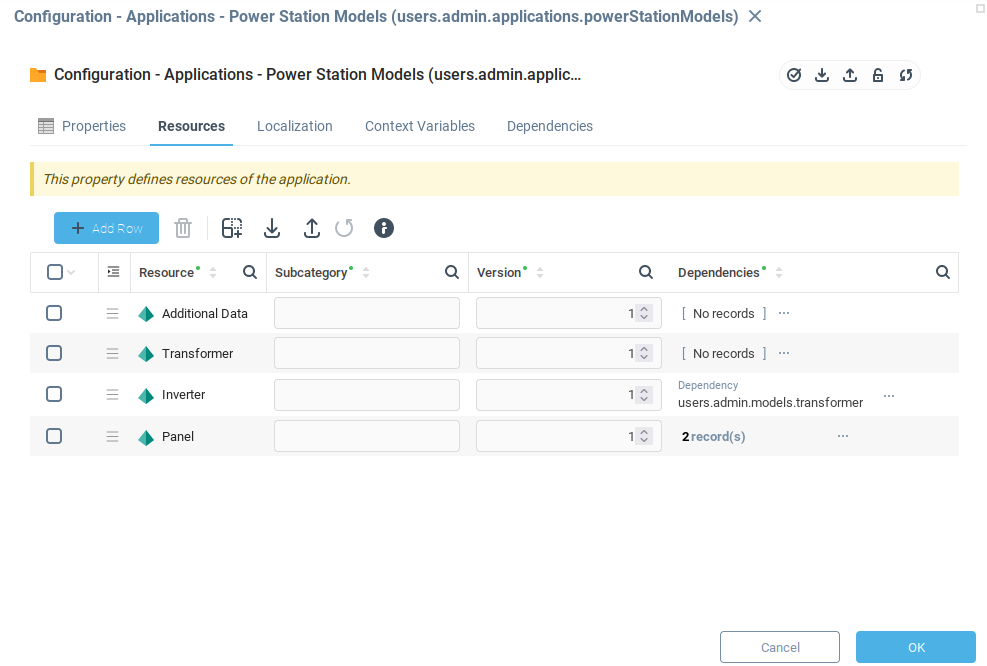
These model resources are now added to the application, as well as their dependencies. Save and close the application configuration window.
Consider the resources you would like to include in your application. This can include any context in the system, whether included by default or ones which you have created.
Saving the Application
Now that you have defined the application by indicating its constituent resources, navigate to the system tree and open the context menu for your application. Select the Export option.
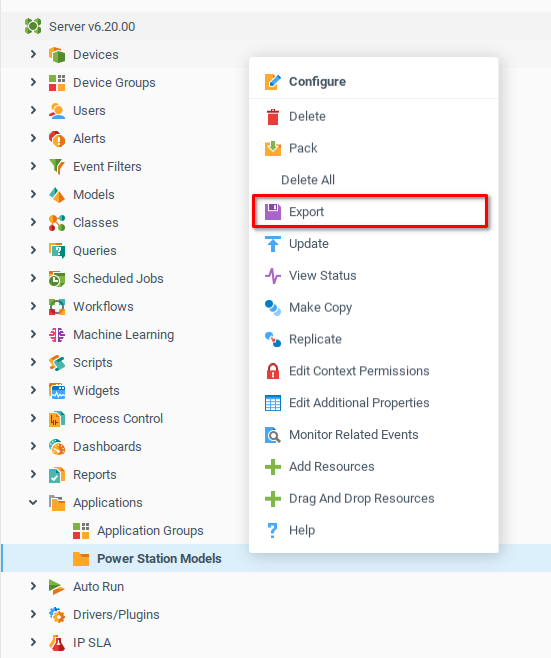
You will be given an option to confirm the location of where to save the application files. After confirmation, the Export Result window will display a list of the files exported and any errors which may have occurred. Once the export is confirmed, navigate to the directory you designated for the application.
You should see a application.*.prs file and application.properties file for the application, as well as *.prs files for each of the resources listed as part of the application. In the power station example we have the following files.
application.properties
application.powerStationModels.prs
model.additionalData.prs
model.inverter.prs
model.panel.prs
model.transformer.prsYou may wish to familiarize yourself with the structure of the *.prs files to see how the information in the Iotellect contexts is represented.
Using Git
The following example uses the open source application Git to demonstrate how to manage application files with version control. To follow along with this example, download Git for your operating system. The following use the Git command line operations. These operations can also be executed in any GUI version of Git.
Navigate to the directory you indicated to store the application via the command line:
Linux:
$ cd /file/path/on/host/machine/appWindows:
$ cd C:/file/path/on/host/machine/appThe remaining commands are the same whether on Linux or Windows.
To create a new git repository in the location of the application files:
$ git init
Initialized empty Git repository in /file/path/on/host/machine/app/.git/This creates a git repository in the app directory. First check the status of the repository.
$ git status

On branch master
No commits yet
Untracked files:
  (use "git add <file>..." to include in what will be committed)
        application.powerStationModels.prs
        application.properties
        model.additionalData.prs
        model.inverter.prs
        model.panel.prs
        model.transformer.prs

nothing added to commit but untracked files present (use "git add" to track)You can use git add <filename> to add each of the files individually or git add . to add all untracked files in the directory with one command.
$ git add .
$ git status

On branch master
No commits yet
Changes to be committed:
  (use "git rm --cached <file>..." to unstage)
        new file:   application.powerStationModels.prs
        new file:   application.properties
        new file:   model.additionalData.prs
        new file:   model.inverter.prs
        new file:   model.panel.prs
new file: model.transformer.prsNow that the files have been added, commit the changes to the master branch. commit adds your changes to the current branch, and the -m flag adds the quoted text as a commit message.
$ git commit -m "Initial Project Version"

[master (root-commit) fcc73d2] Initial Project Version
 6 files changed, 10683 insertions(+)
 create mode 100644 application.powerStationModels.prs
 create mode 100644 application.properties
 create mode 100644 model.additionalData.prs
 create mode 100644 model.inverter.prs
 create mode 100644 model.panel.prs
create mode 100644 model.transformer.prsYou’ve now saved the first version of your application to version control. The next step is to make some improvements to our application and save those changes as well.
Changing the Application
In a previous example, we created a number of variables in the Additional Data model. In anticipation of importing historical data from a remote source, add a new variable outputHistory to the model. The variable should have a date field and a totalEnergyOutput field.
After adding the variable, open Edit Additional Properties from the context menu of the model to ensure that the variable was added correctly
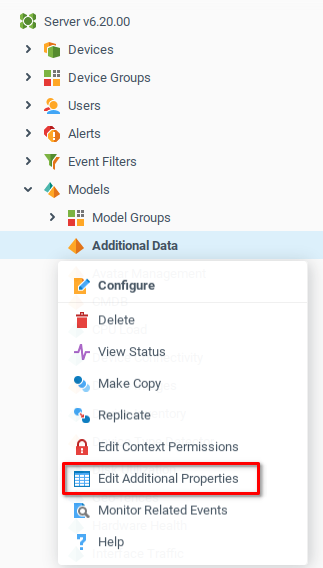
From the Additional Properties window, you should see that a new variable is accessible.
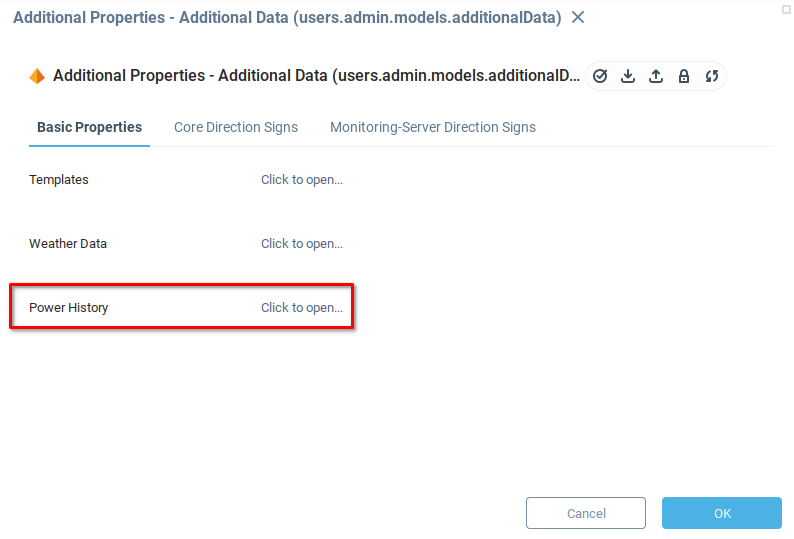
Satisfied that the new variable has been added to the model, it’s time to update the version of the application.
Creating a New Application Version
Navigate to the application Power Station Models and choose Configure from the context menu.
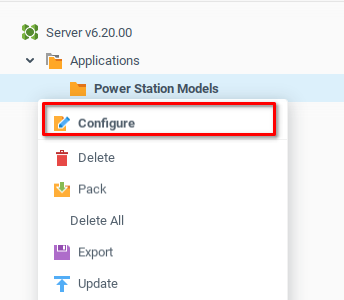
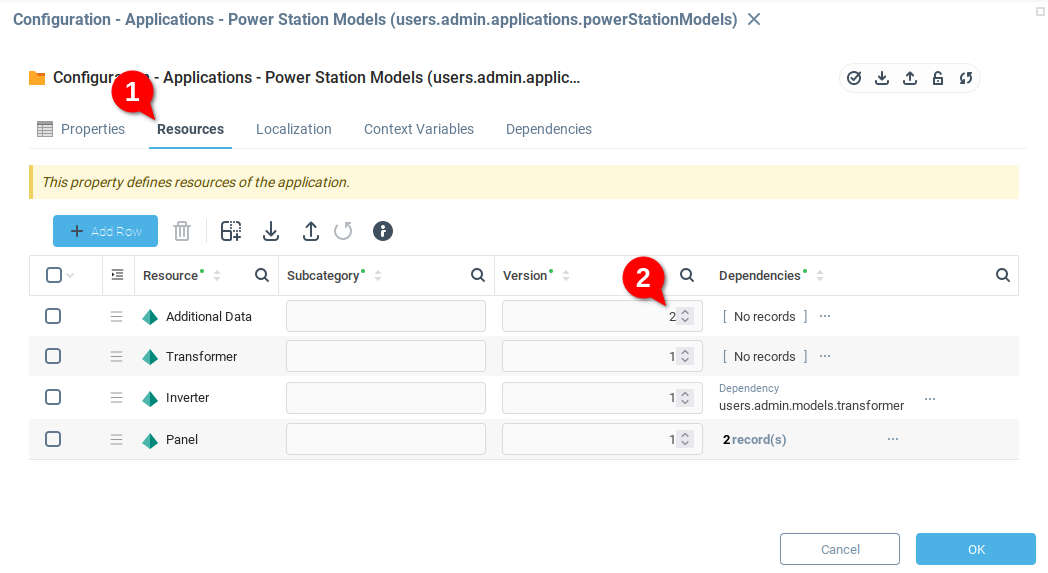
Navigate to the Resources tab (1) of the configuration window, and increment the Additional Data version variable to 2 (2). Click OK to save and close.
Again, open the context menu for the application Power Station Models, but this time select Export. Confirm the correct export directory, and close the success dialogue.
Committing Changes in Git
Return to the application directory in your operating system. Through the git status command you can see that some changes have been made to the application files.
$ git status

On branch master
Changes not staged for commit:
  (use "git add <file>..." to update what will be committed)
  (use "git restore <file>..." to discard changes in working directory)
        modified:   application.properties
        modified:   model.additionalData.prs
If you’d like to see what changes have been made, use the command git diff <file name> before adding the file to be staged for commit. For example,
$ git diff application.propertiesWill generate a file with the following information.
diff --git a/application.properties b/application.properties
index 73af7c2..7e1a6c9 100644
--- a/application.properties
+++ b/application.properties
@@ -1,4 +1,4 @@
-#Thu Nov 3 17:13:27 NOVT 2022
+#Thu Nov 3 21:14:25 NOVT 2022
 serverVersion=6.20.00
 mainApplicationFileName=application.powerStationModels.prs
dependencies=The key part to interpret in the above file are the parts preceded by + and - which respectively indicate lines that were added or removed. From the above snippet, we see that this update to the application simply changed the timestamp in the application.properties file.
-#Thu Nov 3 17:13:27 NOVT 2022
+#Thu Nov 3 21:14:25 NOVT 2022If you examine changes to the the model.additionalData.prs file, you will find a few lines describing the new variable which was just added to the model.
Git Branches
Before committing the changes to the main branch of our project, suppose that you’re not sure whether you want to add the new variable to the application. Maybe you’re working on a specific feature which requires a number of changes to be made to the application, and then committed all at once.
In any case, you will need to create a new branch. Create a new branch power_history_variable and move onto the new branch with the checkout command and the -b flag.
$ git checkout -b power_history_variable

Switched to a new branch 'power_history_variable'Now that you’re on the new branch, add the changed files.
$ git add application.properties model.additionalData.prsCommit the changes to the new branch with a descriptive comment.
git commit -m "Adds variable 'Power History' to the Additional Data model"

[power_history_variable 49a2a03] Adds variable 'Power History' to the Additional Data model
2 files changed, 455 insertions(+), 1 deletion(-)You can continue working on the new branch, adding changes until you are satisfied that the new feature is ready to be added to the application.
Importing Application Versions
Suppose that you would like to change versions of the application. Perhaps your colleague has developed a new feature for you to try. Whatever the use case, the Application module can also be used to import applications.
Since you already committed the changes to the application with the Power History variable to the branch power_history_variable , you can safely change back to the master branch without losing any work.
Switch branches with the git checkout command.
git checkout masterYou can confirm that files have been returned to the previous state by checking the timestamp in the application.properties file.
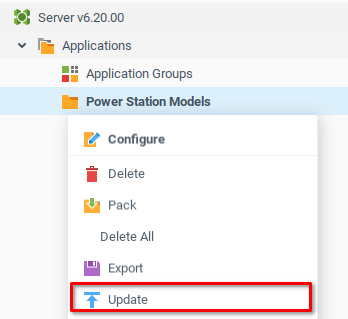
Returning to the web interface of Iotellect, open the context menu of the Power Station Models application and select the Update option.
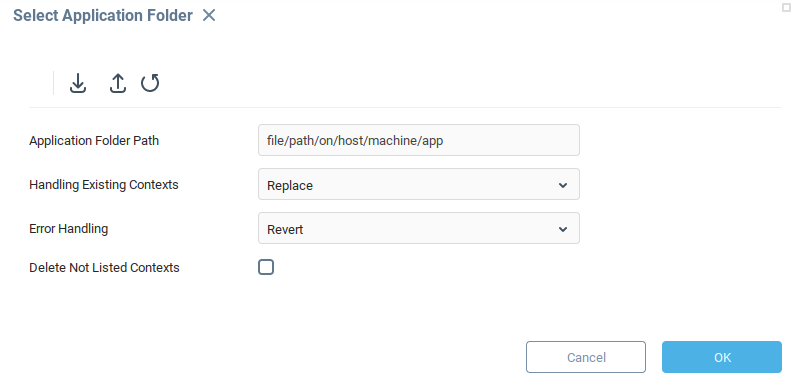
The Select Application Folder window allows you to set a few parameters for the application import.
Application Folder Path - As previously, the directory where the application files are located.
Handling Existing Contexts - Options for how to import context which already exist in the system.
Replaceis the appropriate choice, since this particular instance we have changedError Handling -
Revertwill return the application to its previous state if any errors occur. This is the safest option if we are concerned that importing an application could break existing configurations.Delete Not Listed Contexts - Uncheck this box to ignore any contexts not mentioned in the imported application.
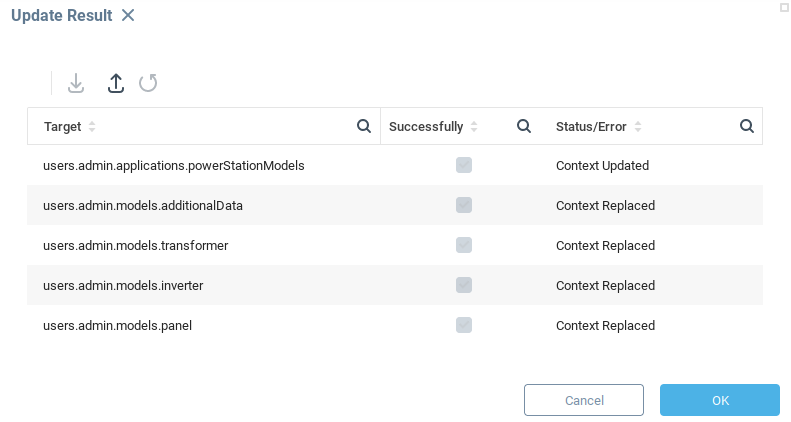
After confirming the application import, the Update Result window reports on the status of update, which should inform you that it was successful for all contexts.
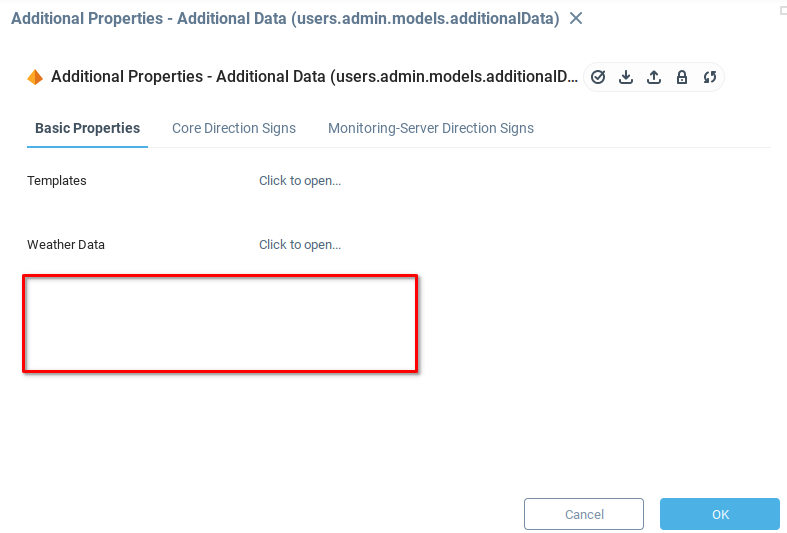
After the import, it may be necessary to restart the Iotellect server in order for all models to become visible. After the restart, opening the Additional Properties from the context menu of the Additional Data model, you see that the model has been reverted to the previous version.
Git is a feature-rich application for version control. If you are interested in learning more about Git, an exercise to try based on this guide would be to merge the branch power_history_variable into the master branch, and import the resulting application into your Iotellect instance.
Was this page helpful?